

Introduction
Software Requirement
- Arduino Uno
- LEDs
- Bread Board
- Hook-Up Wires
Connection from Arduino Board to LEDs
| Leds | Arduino Board |
| Led1 | 11 |
| Led1 | 12 |
| Led1 | 13 |
| Led1 | 14 |
Programming
- #define CUSTOM_SETTINGS
- #define INCLUDE_KEYPAD_SHIELD
- /* Include 1Sheeld library. */
- #include <OneSheeld.h>
- int A, B, C, D; //vaiables with names of buttons in keypad
- /* A name for the LED on pin 8. */
- int yellow = 8;
- /* A name for the LED on pin 9. */
- int green = 9;
- /* A name for the LED on pin 10. */
- int white = 10;
- /* A name for the LED on pin 11. */
- int red = 11;
- void setup()
- {
- /* Start communication. */
- OneSheeld.begin();
- /* Set LEDs as output. */
- pinMode(yellow, OUTPUT);
- pinMode(red, OUTPUT);
- pinMode(green, OUTPUT);
- pinMode(white, OUTPUT);
- }
- void loop()
- {
- Keypad.setOnButtonChange(&lightLed);
- }
- void lightLed (byte rowNumber , byte coloumnNumber)
- {
- /* If keypad's button A is pressed. */
- if(Keypad.isRowPressed(0) && Keypad.isColumnPressed(3))
- {
- A = 1; // press A
- B = 0;
- C = 0;
- D = 0;
- }
- else if(Keypad.isRowPressed(1) && Keypad.isColumnPressed(3))
- {
- A = 0;
- B = 1;// press B
- C = 0;
- D = 0;
- }
- else if(Keypad.isRowPressed(2) && Keypad.isColumnPressed(3))
- {
- A = 0;
- B = 0;
- C = 1; // press c
- D = 0;
- }
- else if(Keypad.isRowPressed(3) && Keypad.isColumnPressed(3))
- {
- A = 0;
- B = 0;
- C = 0;
- D = 1; // press D
- }
- else
- {
- /* Turn off all of LEDs. */
- digitalWrite(yellow,LOW);
- digitalWrite(green,LOW);
- digitalWrite(white,LOW);
- digitalWrite(red,LOW);
- }
- if(A) //press button A
- digitalWrite(yellow, HIGH);
- if(B) //press button B
- digitalWrite(green, HIGH);
- if(C) //press button C
- digitalWrite(white, HIGH);
- if(D) //press button D
- digitalWrite(red, HIGH);
- }
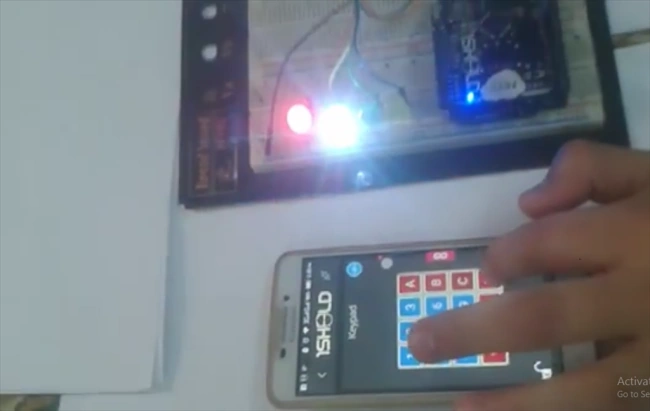
Output
Munish APosted Apr 7, 2018, 2:19 AM
Nice post.................
RajaPosted Oct 31, 2016, 8:00 AM
Great
Prasanna MuraliPosted Oct 9, 2016, 10:12 AM
Nice post
Anu VPosted Oct 6, 2016, 11:52 PM
Nice..