

Introduction
In this article, we'll learn how to create Component and Dynamic Component Loader in Angular.
Dynamic Component Loader
The Angular application may need to load new components at runtime.
Steps to follow:
Step 1
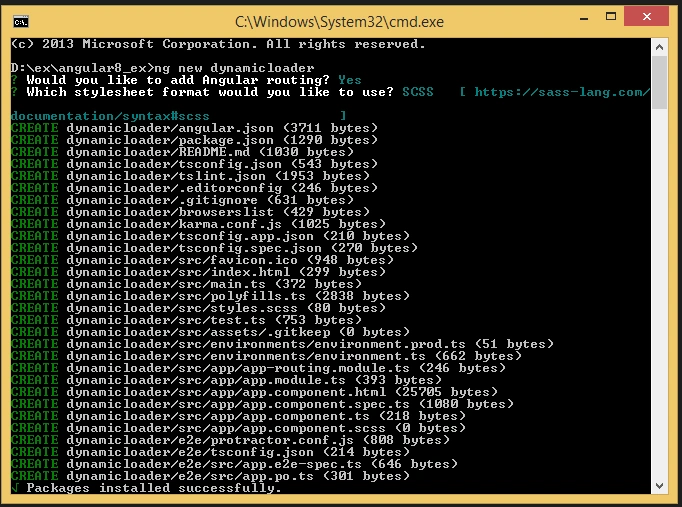
Create an Angular project setup using the below command or however you want to create it.
ng new projectname
Example,
ng new dynamicloader
Step 2
Now, we must generate Component from our Angular cli. Open a new terminal and run the below command.
ng generate component page1
or
ng g c page1
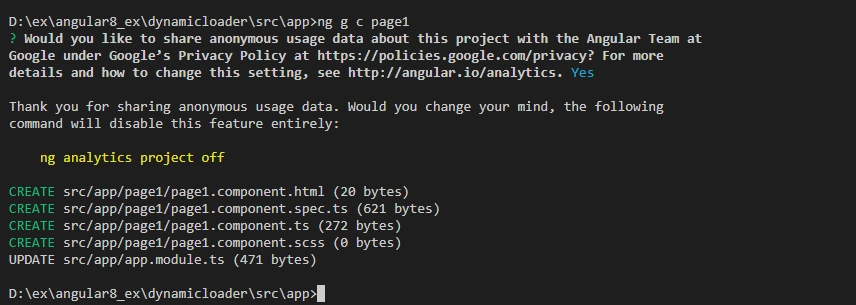
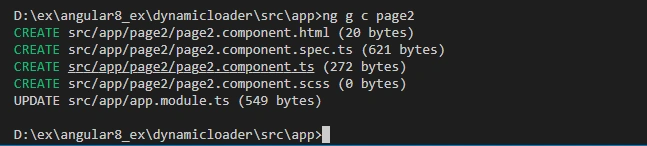
Now we are creating multiple components, one as page1 and another one in the next steps.
ng generate component page2
Step 3
Now, we can do some code in page1.component
page1.component.ts:
title:any;
page1.component.html:
<p>Component Title {{title}}</p>
This is the same as another component we will see in the below code:
Page2.component.ts:
title:any;
page2.component.html:
<p>Component Title {{title}}</p>
Step 4 - What is ComponentFactoryResolver
A simple registry that maps Components to generated Component Factory classes that can be used to create instances of components. Use to obtain the factory for a given component type, then use the factory's create () method to create a component of that type.
What is ViewContainerRef?
Now, we are inserting new components or templates programmatically, we probably used the ViewContainerRef service.
Now, we can do some code in app.component.ts
- import {
- Component,
- Input,
- OnInit,
- ViewChild,
- ComponentFactoryResolver,
- OnDestroy,
- ViewContainerRef
- } from '@angular/core';
- import {
- Page1Component
- } from './page1/page1.component';
- import {
- Page2Component
- } from './page2/page2.component';
- @Component({
- selector: 'app-root',
- templateUrl: './app.component.html',
- styleUrls: ['./app.component.scss']
- })
- export class AppComponent {
- title = 'dynamicloader';
- sampleComponents = [
- Page1Component, Page2Component
- ];
- @ViewChild('sample', {
- read: ViewContainerRef
- }) sample: ViewContainerRef;
- constructor(private componentFactoryResolver: ComponentFactoryResolver) {}
- ngOnInit() {
- this.sample.clear();
- let page1ComponentFactory = this.componentFactoryResolver.resolveComponentFactory(this.sampleComponents[0]);
- let page1ComponentRef = this.sample.createComponent(page1ComponentFactory);
- ( < Page1Component > page1ComponentRef.instance).title = 'Page1';
- let page2ComponentFactory = this.componentFactoryResolver.resolveComponentFactory(this.sampleComponents[1]);
- let page2ComponentRef = this.sample.createComponent(page2ComponentFactory);
- ( < Page2Component > page2ComponentRef.instance).title = 'Page2';
- }
- }
In this example, we can use the ViewChild decorator to grab any element in our view and read him as ViewContainerRef.
Step 5
Now, we can assign the id in app.component.html
- <ng-container #sample></ng-container>
ng-container
ng-container is a directive. It will avoid creating that extra div, we can instead use ng-container directive and it can also provide a placeholder for injecting a template dynamically into the page.
Step 6
Now we check the app.module.ts,
- import {
- BrowserModule
- } from '@angular/platform-browser';
- import {
- NgModule
- } from '@angular/core';
- import {
- AppRoutingModule
- } from './app-routing.module';
- import {
- AppComponent
- } from './app.component';
- import {
- Page1Component
- } from './page1/page1.component';
- import {
- Page2Component
- } from './page2/page2.component';
- @NgModule({
- declarations: [
- AppComponent,
- Page1Component,
- Page2Component
- ],
- entryComponents: [
- Page1Component, Page2Component
- ],
- imports: [
- BrowserModule,
- AppRoutingModule
- ],
- providers: [],
- bootstrap: [AppComponent]
- })
- export class AppModule {}
Step 7
Now, run the application.
npm start
Join the conversation! Your thoughts help the community grow.