

Some of us want to create a SharePoint site when an item is added to a SharePoint list. For SharePoint on-premise, we can achieve this using the event receivers and with SP online we can use designer workflow with REST API calls to achieve this.
Introduction to Designer Workflows
- SharePoint Designer is one of the best tools for creating workflows.
- A lot of activities, actions, and conditions are available in Designer. We can create rules that associate conditions and actions with items in SharePoint List and Libraries.
- We can use the workflow for the business process and approval process.
Below are the workflow start options for SharePoint List & Libraries.
- Allow workflow to be manually started.
- Start workflow automatically when an item is created.
- Start workflow automatically when an item is changed.
Steps to Create a Site Using Workflow
In a previous article, we have seen how to create a list workflow using SP Designer.
Once you have created the list workflow using the above article follow the below-listed steps to create a site using designer workflow.
Note. You need to activate the “Workflow can enable app permission” feature to enable the app step in the designer. Inside the app step only we will add the logic (REST API call) to create a site. The user performs the below step to activate the feature.
Go to site - settings - Manage site features - “Workflow can enable app permission” - Activate.

After activating the feature get the app identifier.
Go to site - settings - App permissions

On the site app permission page, you can see the workflow and then get the workflow ID as shown below.
App Permissions
Then go to the appinv.aspx page using the below URL,
Append /_layouts/15/appinv.aspx to the site URL to see the hidden App Permissions page
Enter the selected workflow App ID and click the pop-up
Provide below XML on the Permission Request XML Textbox as shown below and click on the Create button.
<AppPermissionRequests>
   <AppPermissionRequest Scope="http://sharepoint/content/sitecollection" Right="FullControl"/>
</AppPermissionRequests>
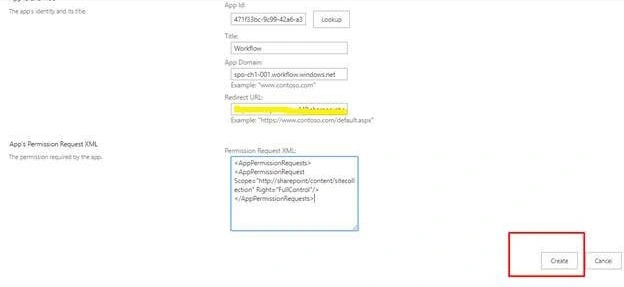
App Step will be enabled on the designer after you do the above steps. Then follow the below procedure.
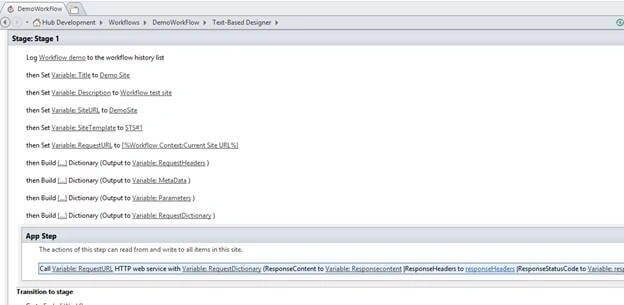
Step 1. Create variables in workflow,
- Title: New Site Title
- Description: New Site Description
- SiteURL: New site URL name
- SiteTemplate: it may be a team site, blog, project, etc.
- RequestURL: URL of Where the site has to be created
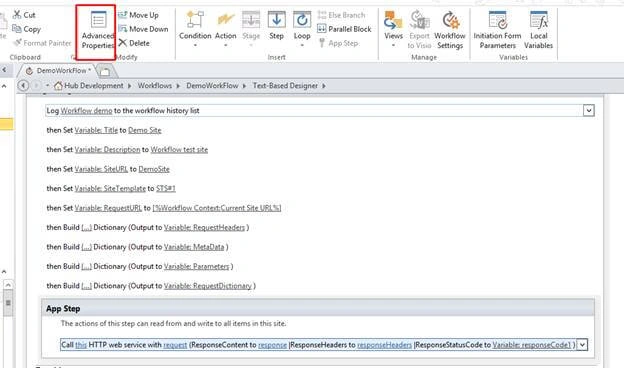
Here is the Workflow screenshot for your reference.
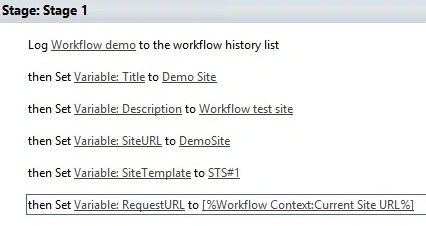
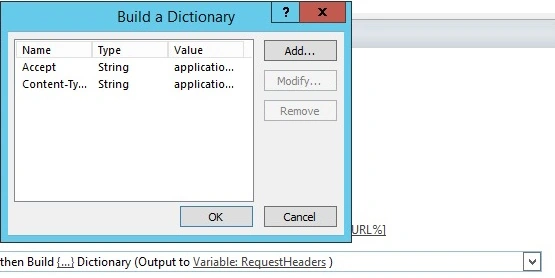
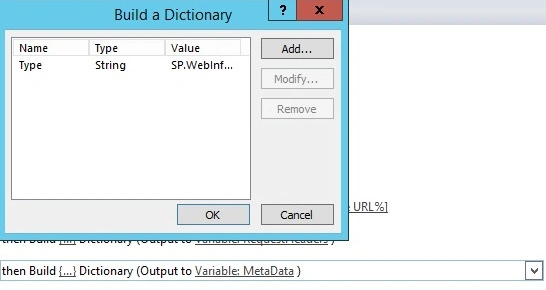
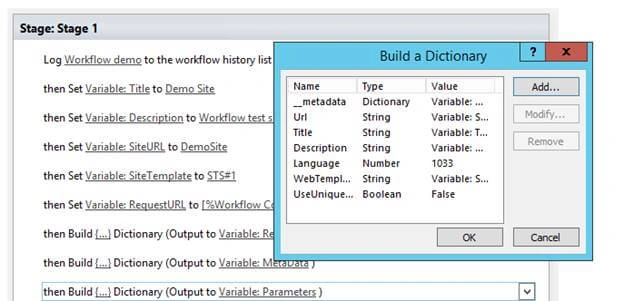
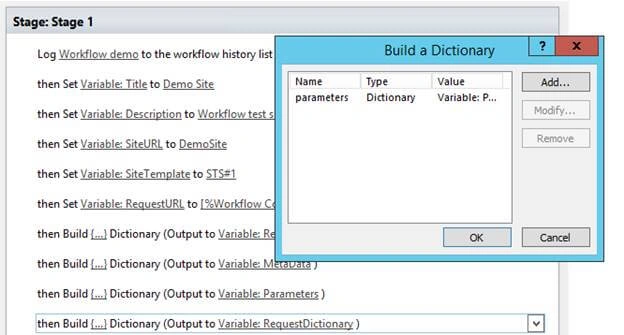
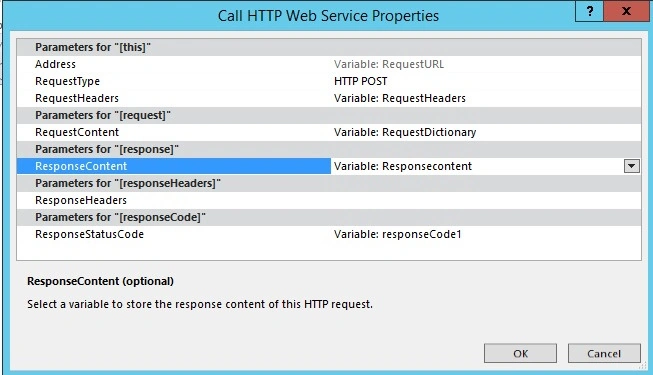
Step 2. Build a dictionary value for the REST API call, below dictionary values need to be created.
RequestHeaders
| Name | Type | Type |
| Accept | String | application/json;odata=verbose |
| Content-Type | String | application/json;odata=verbose |


Christopher ArayaPosted Jun 20, 2019, 5:17 PM
I have a problem when executing the flow, it runs very fast and the responseCode shows me Unauthorized, I already assigned the full control permissions to the workflows, any idea what it could be?
Vignesh ManiPosted Apr 28, 2018, 8:28 AM
Good article. Thank you for sharing.
Naresh SinghalPosted Apr 27, 2018, 11:57 PM
Very well explained Kaviya Balasubramanian , Keep on !!
Mahesh VermaPosted Apr 27, 2018, 7:02 PM
Great explaination Kaviya :-)