

Introduction
In this article you will see how to create a multi-screen request form app for SharePoint Online list using PowerApps. Refer to getting started with PowerApps and Flow for more details. Refer to my previous article on how to create a simple approval app using PowerApps and Flow in SharePoint Online. I have created a custom list in SharePoint online named Site Request which contains the following columns.
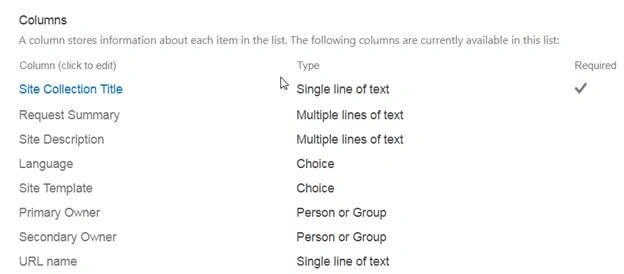
Instead of filling all the above details in a single screen you will see how you can split it into multiple screens and submit the details.
Create an app for SharePoint Online list using PowerApps
In this section you will see how to create an app for SharePoint Online list using PowerApps.
- Navigate to custom list (Site Request) in SharePoint Online site. For example, https://c986.sharepoint.com/sites/Vijai/Lists/Site%20Request/AllItems.aspx
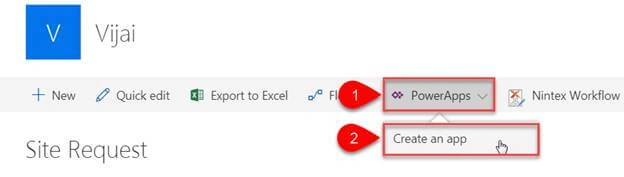
- Click PowerApps and then click Create an app.
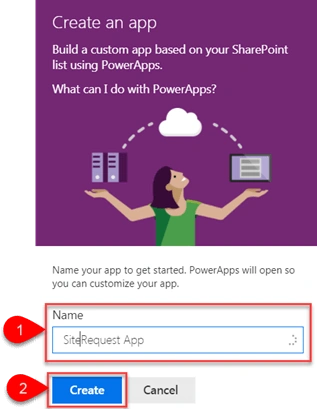
- Enter app name and then click Create
- Building and saving your app.
- By default, generated app contains Browse, Detail and Edit screen.
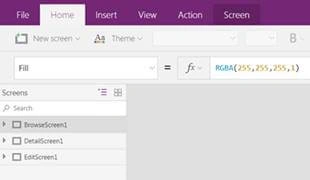
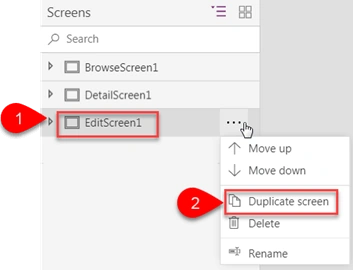
- Select EditScreen1, click ”...” and then click Duplicate Screen.
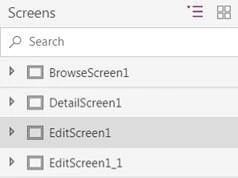
- EditScreen1_1 is created.
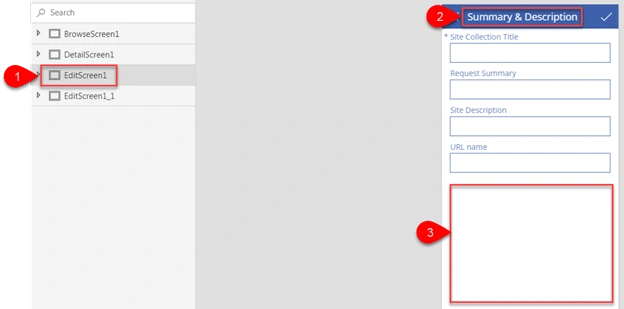
- Click EditScreen1, rename the text as Summary & Description and delete Language, Site Template, Primary Owner & Secondary Owner card.
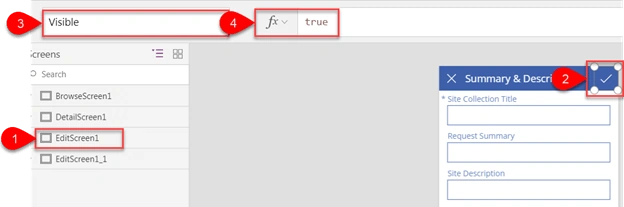
- Click Accept icon, select Visible property from property box and set the values as false in the formula.
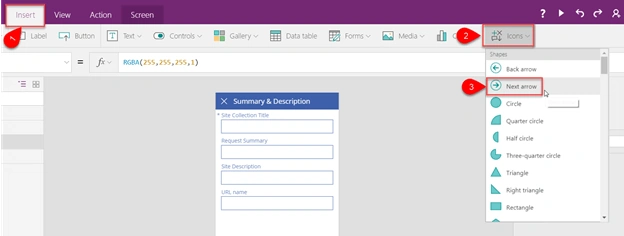
- Click Insert tab and then click Next Arrow from Icons.
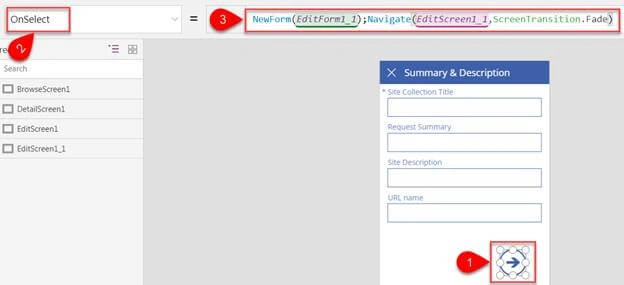
- Click Next Arrow icon, select OnSelect from property box and enter “NewForm(EditForm1_1);Navigate(EditScreen1_1,ScreenTransition.Fade)” in the formula bar.
- Click EditScreen1_1, rename the text as Additional Details and delete Site Collection Title, Request Summary, Site Description and URL Name card.
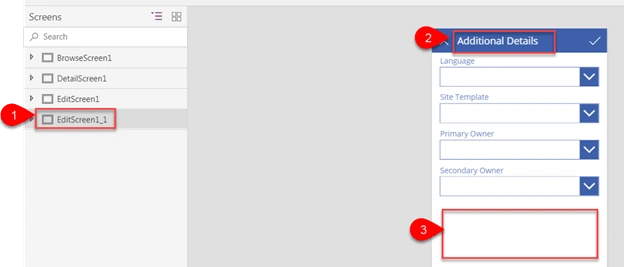
- Click Accept icon, select Visible property from property box and set the values as false in the formula.
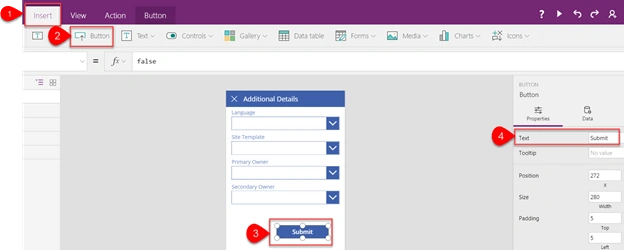
- Click Insert tab and then click Button. Change the button text to Submit.
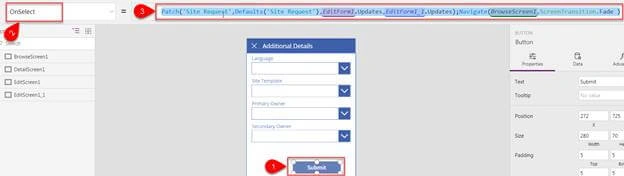
- Click Submit button, select OnSelect from property box and enter “Patch('Site Request',Defaults('Site Request'),EditForm1.Updates,EditForm1_1.Updates);Navigate(BrowseScreen1,ScreenTransition.Fade )” in the formula bar.
- Save and publish the app.
Testing the app
- Navigate to custom list (Site Request) in SharePoint Online site. For example, https://c986.sharepoint.com/sites/Vijai/Lists/Site%20Request/AllItems.aspx
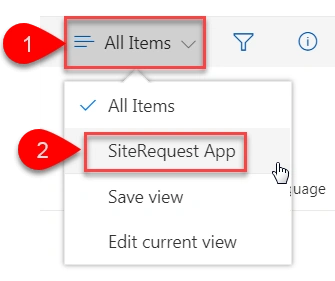
- Click All Items drop down to view options and then click SiteRequest App which we have created.
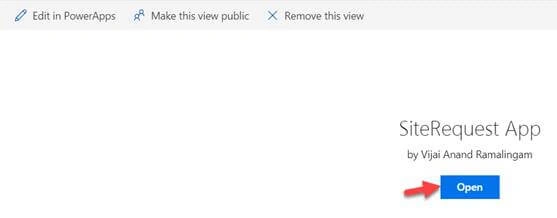
- Open the app.
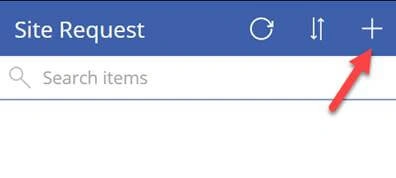
- Click “+” icon to create site request.
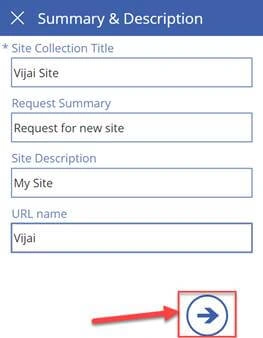
- Enter the details in Summary & Description screen and click Next
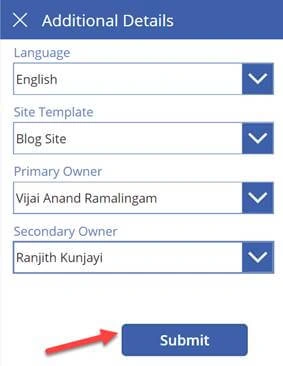
- You will be navigated to Additional Details screen and enter the details. Click Submit
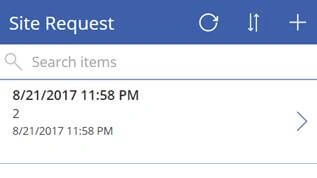
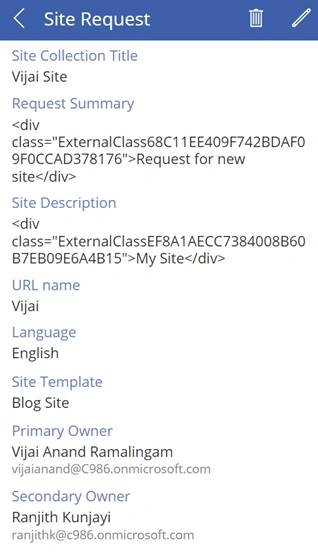
- You will be navigated to browse screen and request was created successfully.
Reference
https://powerusers.microsoft.com/t5/PowerApps-Ideas/Multi-page-Forms/idi-p/2981#comments
Result
Thus in this article you saw how to create a multi-screen request form app for SharePoint Online list using PowerApps.
Mustafa HussainPosted Jun 6, 2020, 2:54 PM
Hey, Vijai Whats the code for OnSuccess of each form??
Mustafa HussainPosted Jun 5, 2020, 6:27 AM
Hello, Vijai I have found your article very interesting, but the thing is I have 4 different screens with different Forms with different fields some are required and some are not, but when I press the Next button as you did on your first screen, it cannot submit it says an error that this field cannot be empty that field is on next screen and on that form and it's a required field.How can I submit all the forms together into my Sharepoint list? Help me Please
Kapil KondapallyPosted Feb 26, 2019, 2:14 PM
Nice! Thank you! Can we also add the multiple screens as left navigation so that user can click and go to the corresponding screens?
Praveen MulukutlaPosted Jan 9, 2019, 10:14 AM
Hi Vijai, I used similar approach for Dynamics 365 instead of SharePoint. Submitting multiple pages in a go worked pretty good but in between I have got a challenge that, from gallery screen screen 1 with form1 will load and based on the dropdown selected value I have to navigate to screen 2 form2 or screen 3 form 3 which I was not able to apply in step 11.
Brian KennemerPosted Jan 24, 2018, 2:50 PM
This is great, but what if I need to aggregate 3 or 4 or more screens worth of fields into one update? My customer needs the user walked though a wizard or sorts where they will put into into many screens and based on their answers on 1 screen they get sent to a different screen. Then at the end they hit "Submit" and it takes all the fields they have entered across all the screens and creates the item. is there a way to use Patch to do several screens like this?
Vijai Anand RamalingamPosted Aug 25, 2017, 1:41 PM
Updates: In Step 15 - Submit button - Onselect property - formula should be updated to If(EditForm1_1.Mode=FormMode.Edit,Patch('Site Request',BrowseGallery1.Selected,EditForm1.Updates,EditForm1_1.Updates), Patch('Site Request',Defaults('Site Request'),EditForm1.Updates,EditForm1_1.Updates));Navigate(BrowseScreen1,ScreenTransition.Fade )
Mahesh BabuPosted Aug 23, 2017, 4:50 AM
Hi Vijay.. Thanks for your article...I tried this one and working fine upto submission. After submission i tried to edit the data again in the display form. In the first screen data is displaying fine but in the second screen(Additional Details) data not displaying for that item.. I tried my side to rectify the issue, but no luck.. do you have any alternative way to display data in second screen as well.