

Many companies forbid access to certain websites like Gmail and Yahoo. You might want to integrate email functionality in your application and check whether it’s working properly, but how do you check?
Instead of depending on the Gmail or Yahoo, you can set up your own SMTP server and check the functionality.
There are many free applications available, hMailServer is one of them that is open-source and supports common protocols (SMTP, IMAP and POP3).
Download the hMailServer that is about 3MB and follow the installation procedure from the following link.
URL - https://www.hmailserver.com/documentation/latest/?page=howto_install
Let me show you how to configure the hMailServer.
After installation, we must configure the DNS in our local system to check the functionality. Go to the hMailServer folder and Launch “hMailServer Administration”.
Figure 1: HMailServer Administration
Click on the “Add domain” button from the welcome screen and name it as you wish.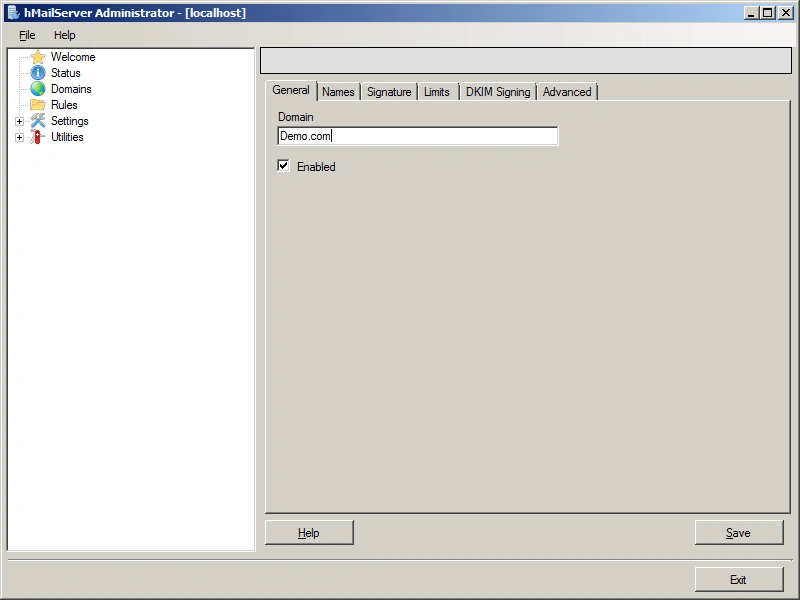
Figure 2: Add Domain
Click on the “Save” button. Open the Domains from the right side where you can see 3 folders are created by default.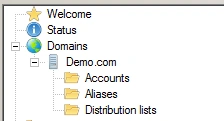
Figure 3: Default Folder
Right-click on the “Accounts” folder and select the “Add” option. Let us create 2 users for our testing purposes.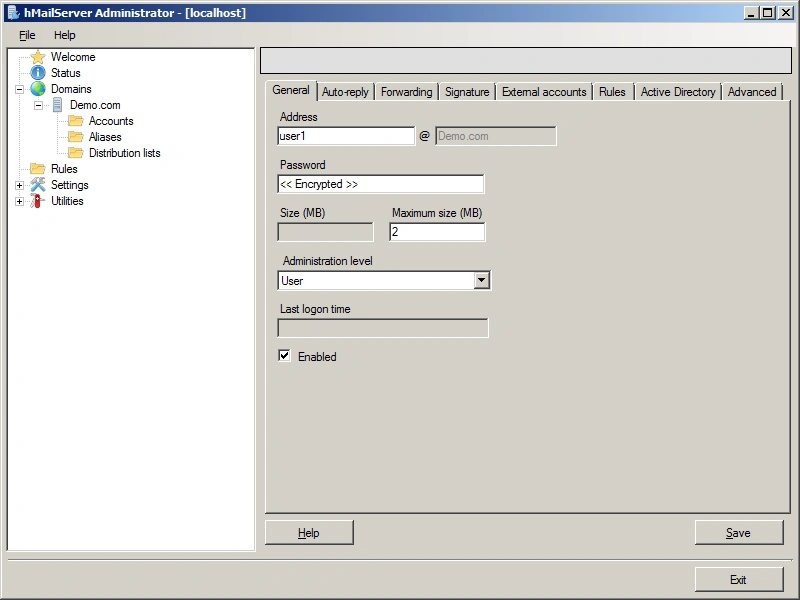
Figure 4: Account
Fill in all 3 fields (Address, Password and Maximum size) and click on the save button.
Create another user with the same procedure as above. Now you have created a domain “Demo.com” with 2 users ([email protected], [email protected]).
Add one entry for our domain in the Hosts file. Use the following procedure.
- Open the Run prompt.
- Type “Drivers” and click on the “Ok” button.
- Open the “etc” folder and open the “Hosts” file.
- Add the following entry & save the file.
127.0.0.1 demo.com
Note: Before doing any changes on the Hosts file, please take a backup of it.
Now let us check whether we have configured the SMTP properly or not. Open your command prompt and type in the following command.
telnet demo.com 25
You will see the following screen if you have done the configuration correctly.
Figure 5: Output
Next we must configure the database. This is where all the settings are stored. It supports the following databases.
- Microsoft SQL Server 2000 or later.
- MySQL.
- PostgreSQL.
Let us see how to configure the database for hMailServer. Open the hMailServer Database Setup from the installation folder.
Figure 6: Configure Database
Click the Next button in the preceding window.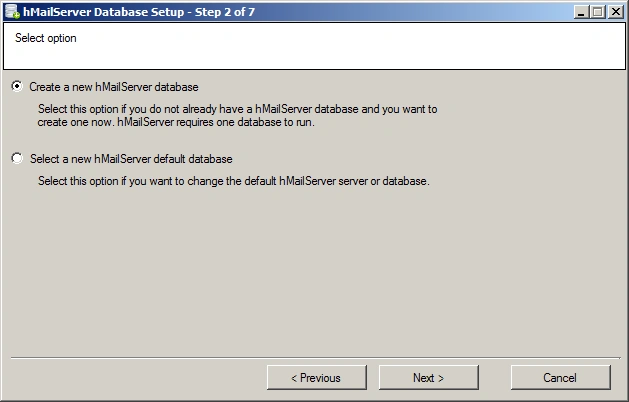
Figure 7: New Window
Select “Create a new hMailServer Database” and proceed. Next.Select “Microsoft SQL Server” and click Next.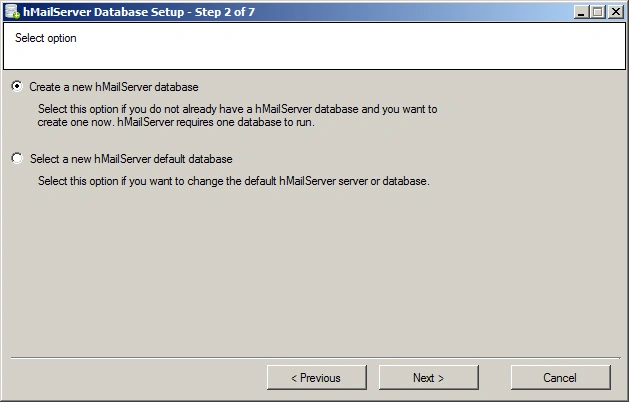
Figure 8: Microsoft SQL Server 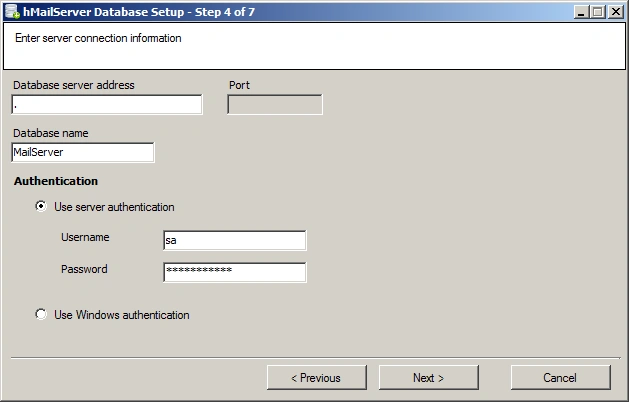
Figure 9: Click Next
Provide an existing server address and database name as you wish and authentication details and click Next.
It will create a database with the following tables in the SQL Server .All mail related settings are in the database.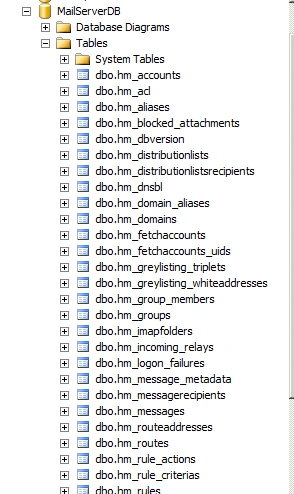
Figure 10: Database Table
That’s it. Now you have configured the SMTP server in your local system. Let us create a simple console application in C# and test the mail functionality.
- class Program
- {
- static void Main(string[] args)
- {
- string mailstatus = SendEmail("[email protected]", "Testmail", "Hey i have setup my own SMTP server.Let us check it out!!!");
- Console.WriteLine(mailstatus);
- Console.ReadKey();
- }
- public static string SendEmail(string toAddress, string subject, string body) {
- string result = "Message Sent Successfully..!!";
- string senderID = "[email protected]";
- const string senderPassword = "password";
- try {
- SmtpClient smtp = new SmtpClient
- {
- Host = "demo.com",
- Port = 25,
- DeliveryMethod = SmtpDeliveryMethod.Network,
- Credentials = new System.Net.NetworkCredential(senderID, senderPassword),
- Timeout = 30000,
- };
- MailMessage message = new MailMessage(senderID, toAddress, subject, body);
- smtp.Send(message);
- }
- catch (Exception ex)
- {
- result = "Error sending email.!!!";
- }
- return result;
- }
- }
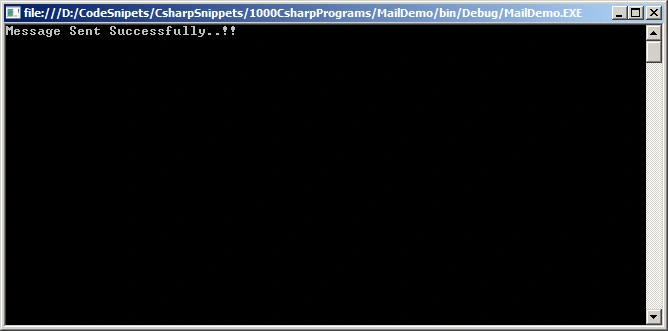
Figure 11: Output 2
If you get the preceding screen then you have done a great job. To confirm whether user1 has sent a mail to user2, let us check in the database.
Open your SQL Server Management Studio and connect to your database. Run the following query in your database.
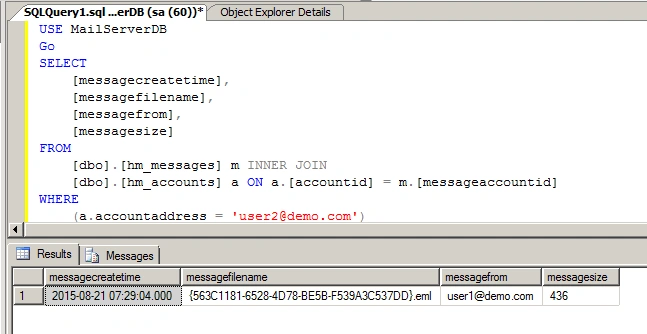
Figure 12: SQL Query
I am checking whether the user2 got mail from a user.Yes he got the mail from the user1. All the mails will be stored in the folder in the encrypted form.
Go to the path where you have installed your hMailServer. I have installed the application in the following path. C:\Program Files\hMailServer\.

Figure 13: Select a path
You can see the folder with your domain name. Open that folder. There you can see a folder with your “user2” name. Right-click on the file and open it in Notepad.
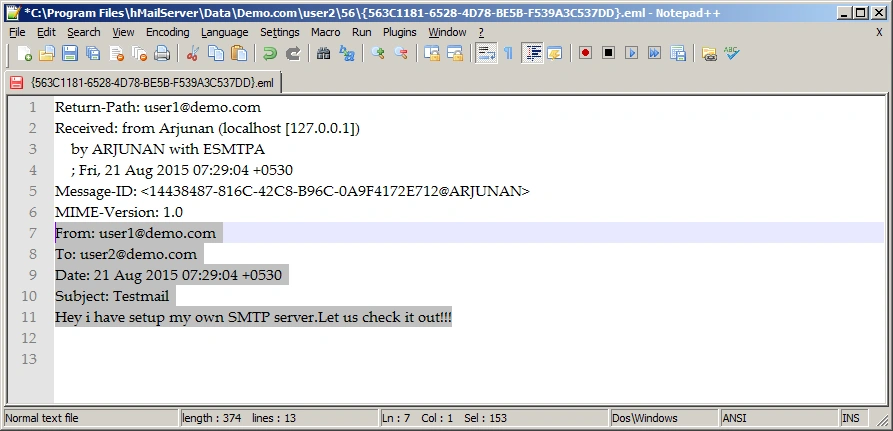
Figure 14: Domain Name
You can see all the information that we set in C#. I hope you have enjoyed the article. Thanks for reading. I’m sharing in articles whenever I learn something new. Thanks a lot for your patience.
Tuangerrard PhanPosted Apr 26, 2018, 12:19 PM
If I create MailServer and MailClient on 2 "Ethernet interface name". In other words, MailServer address isn't localhost but 192.168.xx.xx), How is it solve???
SubashPosted Jul 25, 2016, 12:26 AM
Nice one
Yashwanth MuthineniPosted Aug 22, 2015, 7:21 AM
Nice share
Santhakumar MunuswamyPosted Aug 22, 2015, 6:35 AM
Nice Article. Thanks for sharing
Manas MohapatraPosted Aug 21, 2015, 2:35 PM
It is Nice option. Thanks for sharing..
Gopi ChandPosted Aug 21, 2015, 1:55 PM
Well done
RakeshPosted Aug 21, 2015, 11:09 AM
Good Work
Nilesh JadavPosted Aug 21, 2015, 9:52 AM
Nice work sir
Upendra Pratap ShahiPosted Aug 21, 2015, 8:58 AM
nice
Dev DivisionPosted Aug 21, 2015, 7:00 AM
Nice one
Mohammed IbrahimPosted Aug 21, 2015, 6:11 AM
nice Article
Vaikesh K PPosted Aug 21, 2015, 5:56 AM
Good Share
Sibeesh VenuPosted Aug 21, 2015, 5:25 AM
Nice Share...
Karthikeyan KPosted Aug 21, 2015, 4:39 AM
Thanks for share
Ankit BansalPosted Aug 21, 2015, 4:36 AM
good share...
Rajeesh MenothPosted Aug 21, 2015, 3:52 AM
Nice Share..
Gowtham KPosted Aug 21, 2015, 3:52 AM
Good one
Sumit JoshiPosted Aug 21, 2015, 2:56 AM
Thanks for sharing.