

Introduction
In this article, I am not paying much attention to the theory.
This is the continuation of Part 2. If you are new to MVC then I will strongly recommend you to please go through parts one and two before proceeding to this article. Click the following links for the previous parts of this tutorial.
In the last tutorial, we saw the basics of Views. We will now discuss the concept of the Model in MVC. A MVC Model is typically a class (of C# or VB.NET). All the views and the controller can access the Model class. The main purpose of the Model class is to communicate to the database and apply validation on that data.
Data access in MVC using Entity Framework
By using the Entity Framework we can communicate with the database in MVC. There are the following three approaches to communicate with a database in Entity Framework.
- Code First Approach
- Database First
- Model First
Code First Approach
As the name suggests, in this approach, we will write the code first to generate the database and in one good day, we will run that code to see the database in the DB server. Here are a few possible scenarios where we can implement the Code First Approach.
- If you are a hard-core developer and always like to play with code then the Code First Approach is fit for you.
- If you want full control over your database design without much knowledge of SQL and a DBA.
- If the application is brand new and is there is no existing database for that application.
In the following example, we will go with an Employee and a department table. There is the following procedure you need to follow for the Code First Approach of Entity Framework and then migrate it to a SQL Server database.
Step 1
Open Visual Studio and go to New project under the web tab.

Step 2
Select MVC from the template and click OK.
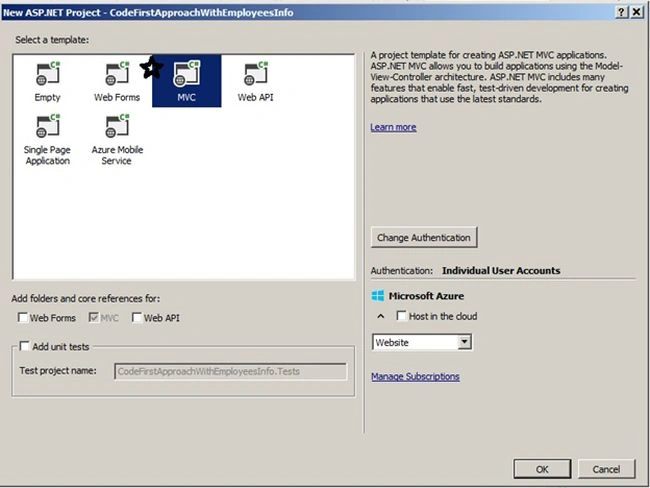
Step 3
The MVC application solution has been automatically created with some default controller Models and Views. You can delete it or leave as it is.
Then right-click on the Models folder and select Add and select the class then name it Employee.
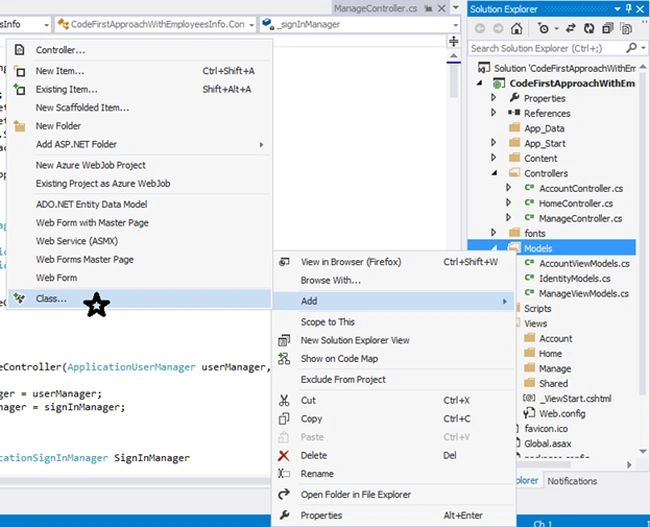
Now your class is ready with the following code.
- using System;
- using System.Collections.Generic;
- using System.Linq;
- using System.Web;
- namespace CodeFirstApproachWithEmployeesInfo.Models
- {
- public class Employee
- {
- }
- }
Add some properties in Employee class
- public class Employee
- {
- public int Id { get; set; }
- public string EmpName { get; set; }
- public int Salary { get; set; }
- public DateTime EmpDOB { get; set; }
- }
This Employee class will represent the Employee table in the database.
Step 4
After adding the Employee Model class add the EmployeeDBContext class in the same Employee class file. Later the EmployeeDBContext will represent the connection string name of the web.config file. This class name and connection string name must be the same. Inherit the EmployeeDBContext class from DbContext. For this you need to add the namespace using System.Data.Entity.
- public class EmployeeDBContext : DbContext
- {
- public DbSet<Employee> Employees { get; set; }
- }
Now add a property Employees of DbSet<Employee>.
Note: The class named EmployeeDBContext class corresponds to the Entity Framework employee's database context. That is helpful for retrieving, storing and updating the employee class instances in the database. The DbContext class provided by the Entity Framework is the base class of EmployeeDBContext.
Step 5
Add the following connection string inside the web.config file.
- <add name="EmployeeDBContext" connectionString="Data Source=(LocalDB)\v11.0;AttachDbFileName=|DataDirectory|\EmployeesDB.mdf;Integrated Security=True" providerName ="System.Data.SqlClient" />
Replace the database file name with yours.
Our connections string is now ready. We will now do CRUD operations with the Employee table.
Step 6
Build the project. Then right-click on the Controllers folder. Select add New Scadffolded Item.
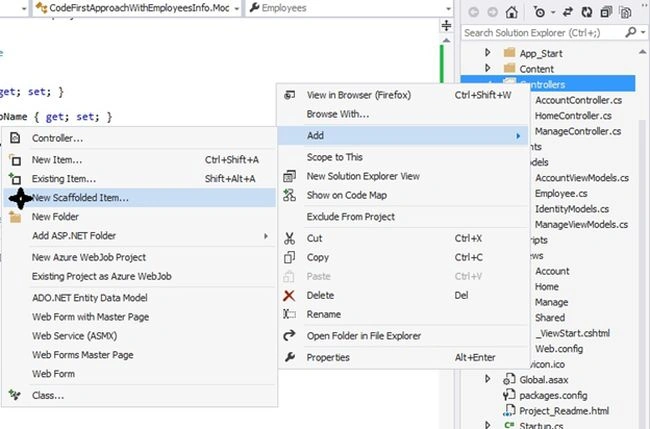
Step 7
Select the MVC tab and select MVC 5 Controller with Views, using Entity Framework and click on Add.
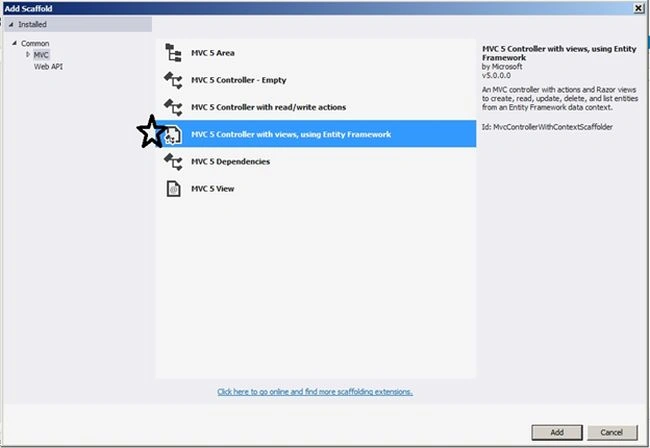
Step 8
Select the Model class as Employee and context class as EmployeeDBContext and click on Add.
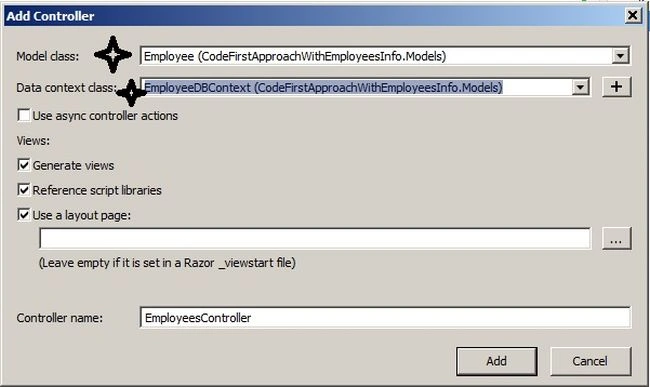
Step 9
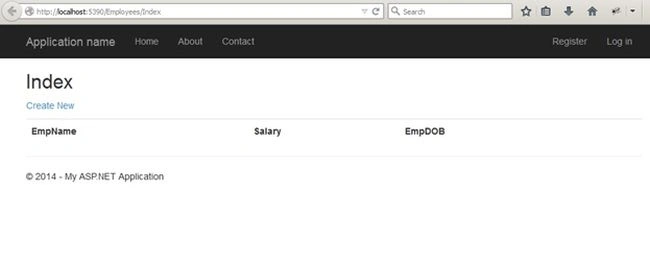
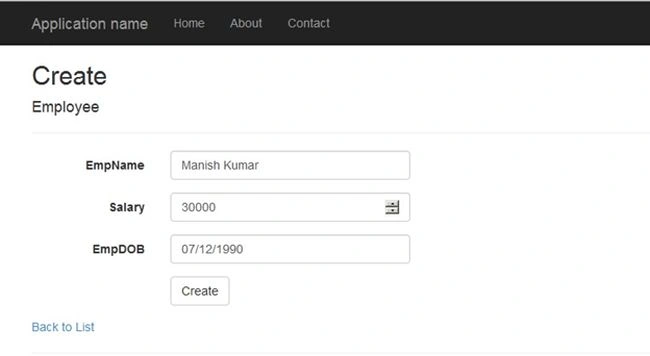
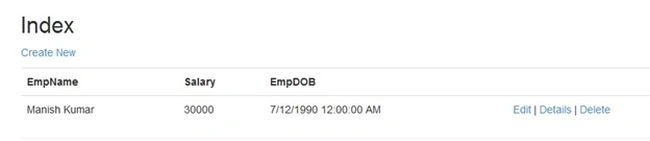
Now the EmployeesController and CRUD operations view is ready with all the required code. In the following image you can see the views and controller. Open the controller class and take a close look at it.

There will be a method.
- // GET: Employees
- public ActionResult Index()
- {
- return View(db.Employees.ToList());
- }



SubashPosted Sep 8, 2016, 1:02 AM
Thanks for sharing sir
Gowtham RajamanickamPosted Mar 13, 2015, 5:25 AM
Good article !
Arun KumarPosted Dec 18, 2014, 3:23 AM
Thank you Manish. It really helps me a lot. :)
Manish Kumar ChoudharyPosted Dec 17, 2014, 6:00 AM
Thanks Anoop Kumar Sharma sir..
Anoop Kumar SharmaPosted Dec 17, 2014, 5:49 AM
Nice Series Manish Kumar Choudhary!!
Manish Kumar ChoudharyPosted Dec 17, 2014, 1:10 AM
Thanks bhanu sir..
Bhanu Pratap SinghPosted Dec 17, 2014, 1:09 AM
very nice explanation - now MVC 6 is about to rock which developed a bridge between MVC developers and Web API developers..
Manish Kumar ChoudharyPosted Dec 16, 2014, 7:34 AM
thanks Vithal Wadje sir..
Vithal WadjePosted Dec 16, 2014, 7:31 AM
Manish Kumar Choudhary sir,day by day you are doing great job..,keep it up