

What are Xamarin and Xamarin Forms?
- Xamarin is a cross-platform to develop Multi-Platform Applications.
- Xamarin is a shared code(C#), But Separately Designs UIs Android(Java), Windows(C#) and iOS.
- Xamarin forums are UI's & shared code (C#) are same. To develop multi-platforms Applications, run all the projects (Android, Windows, IOS) on Same Time.
Prerequisites
- Visual Studio 2017 Enterprise
The steps given below are required to be followed in order to create simple Android Web View Application, using Xamarin.Forms in Visual Studio 2017.
Step 1
- Go to Visual Studio 2017 Enterprise.
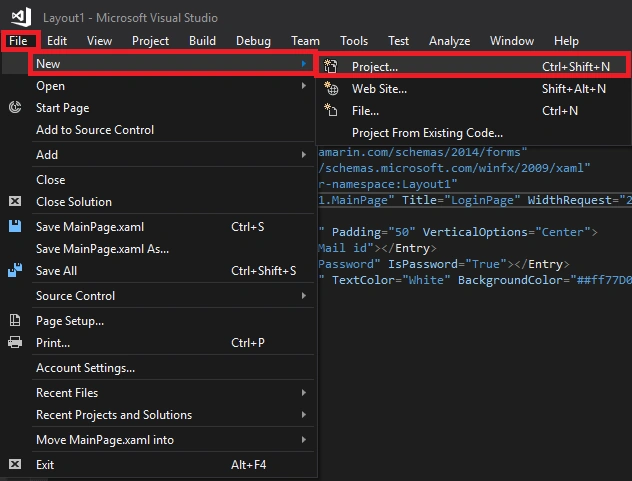
- Click File -> New -> Project.
Step 2
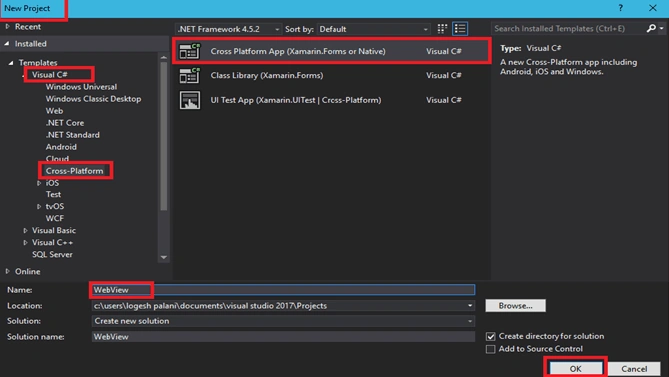
- In this step, click C# -> Cross Platform -> Cross Platform App (Native or Xamarin forms).
- Enter the Application name and subsequently click OK.
Step 3
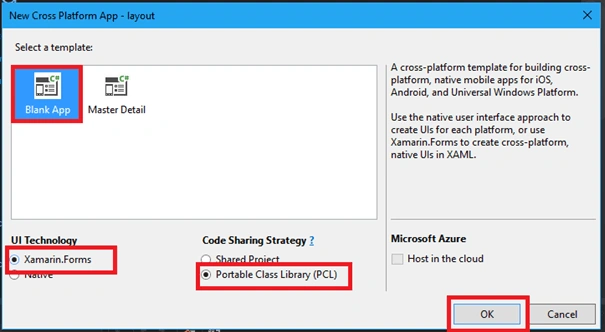
- Afterwards, go to New Cross Platform app and click Blank App ->UIs Technology and click Xamarin forums -> Code sharing strategy is clicked and choose PCL(Portable Class Library), followed by clicking OK.
Step 4
In UWP Project, select Target version & Minimum Version, followed by clicking OK.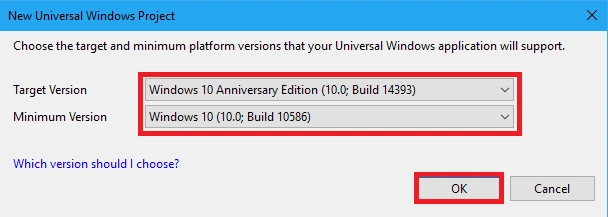
Step 5
In this step, go to Solution Explorer -> Portable Class Library, followed by clicking XAML, Insert the code given below the XAML page and save it.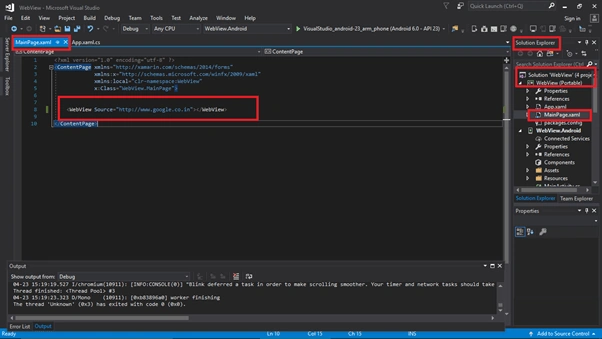
<?xml version="1.0" encoding="utf-8" ?>- <ContentPage xmlns="http://xamarin.com/schemas/2014/forms" xmlns:x="http://schemas.microsoft.com/winfx/2009/xaml" xmlns:local="clr-namespace:WebView" x:Class="WebView.MainPage">
- <WebView Source="http://www.google.co.in"> </WebView>
- </ContentPage>
Step 6
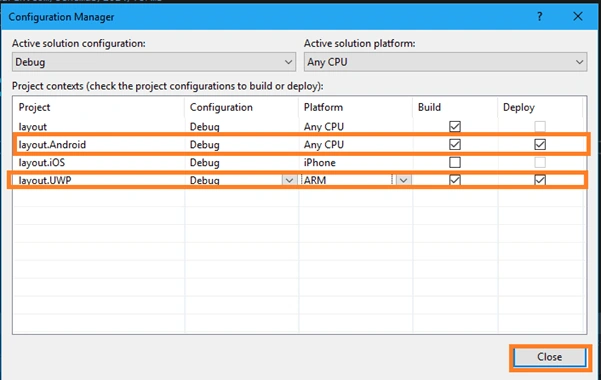
- Click Build menu and go to Configuration Manager.
- Configure your Android, Windows, iOS Depoly & Build Setting, followed by clicking Close.
Step 7
Go to Solution Explorer -> click UWP Application ->Right click, followed by adding the Reference.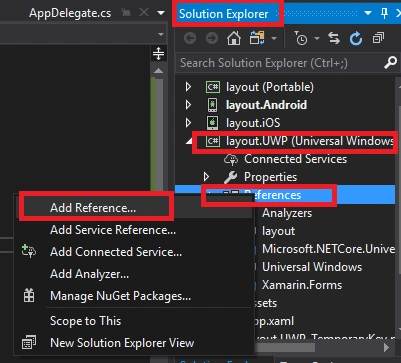
Click Cross Platform ->Extension->add the extension given below.
Windows Desktop Extensions for UWP 10.0.143953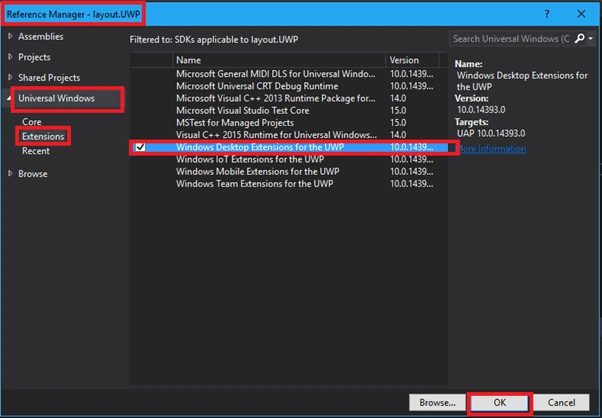
Step 8
- Now, select Build & Deploy option, followed by clicking to start your Application.
Now, go to Run option, choose Debug, the list of Android or an iOS or an UWP Simulators, which are available. You can choose any one Simulator and run it.

Step 9
Output
After few seconds, the app will start running on your Android Simulator. You will see your app is working successfully.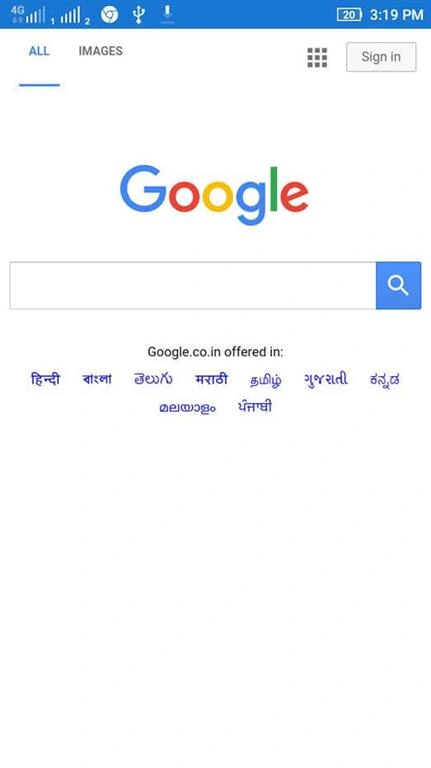
Your Web Application was created succesfully
Conclusion
Thus, we learned how to create an Android Web View Application, using Xamarin.Forms in Visual Studio 2017.
Juan Diego IvarsPosted Jul 29, 2019, 6:06 PM
Hi, I used Xamarin forms but my webView isn't scrolling. Can I help me? thanks!
Derick KabwePosted Jan 13, 2018, 4:13 AM
It worked! but how can i do the same with local content html file