

This is a series of articles related to Source Control or Version Control issues, from stand-alone apps, such as MS SourceSafe, to Server apps, such as MS TFS (Team Foundation Server), to web services, such as GitHub, AWS, and MS Azure DevOps. We tried to categorize this series of articles as Source Control or Version Control. Still, this site does not have these categories, so we make the articles in Category as DevOps, as explained in the wiki.
DevOps is a set of practices that combines software development (Dev) and IT operations (Ops). It aims to shorten the systems development life cycle and provide continuous delivery with high software quality. DevOps is complementary with Agile software development; several DevOps aspects came from the Agile methodology.
The structure of this article series will cover,
- Stand Alone App:
- MS Source Safe
- Server App
- MS TFS (Team Foundation Server)
- Online (Cloud) Centralized Service:
- MS Azure: DevOps
- Boards
- Repos
- Pipelines
- Test Plans
- Artifacts
- GitHub
- AWS GitHub Enterprise
- MS Azure: DevOps
- Distributed App:
- Git
Because these are huge topics, I will not go step by step. Instead, I write any section when I feel ready for it, but each section will be relatively independent to become a reading unit.
- Source Control (1), MS Source Safe --- Stand Alone App
- Source Control (2), MS TFS --- Centralized Server App
- Source Control (2-1), TFS --- Comparison
- Source Control (2-2), TFS --- Merge
- Source Control (2-2), TFS --- Shelving
- Source Control (3), MS Azure DevOps (GitHub, Jira) --- Centralized Service
- Source Control (4), Git --- Distributed App
- Source Control (4-1), Git --- Configuration
- Source Control (4-2), Git --- Configured to Connect to DevOps and GitHub
- Source Control (4-3), Git --- Cherry Pick in Visual Studio
- Source Control (4-4), Git --- Recover Git Tree: Reflog/Reset
- Source Control (4-5), Git --- Recover Deleted Branch
- Source Control (4-6), Git --- Revert
- Source Control (4-7), Git --- Get Specific Version or Commit
- Source Control (4-8), Git --- Get Specific Version or Commit in practice
- Source Control (4-9), Git --- Merge: Fetch, Pull, Push and Sync
- Source Control (5), GitHub access (setup connection)
- Source Control (6), DevOps access (setup connection)
- Source Control (7), GitLab access (setup connection and Clone)
- Source Control (8), Git, Azure Repos, and Visual Studio (Interaction)
- Source Control (9), Push into Git Hub and DevOps
- Source Control (10), Git Hub, DevOps Publish
A - Introduction
In Article Source Control (7), GitLab access (setup connection and Clone), we discussed two ways to Clone the repository from GitLab to the local repository
- by Visual Studio or
- by VS Code
For both of them, we used HTTPS protocol. In fact, there are essentially two protocols, or options, to make clone,
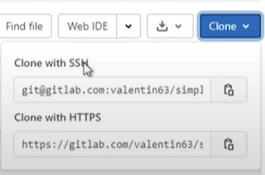
- HTTPS,
- with HTTPS what's happening is that we will be asked for the username and password for cloning; another option is SSH:
- Generally, when working with remote servers, we don't want to use username and password all time.
- SSH
- stands for secure shell and is a cryptographic protocol based on the concept of public and private keys.
- a way to authenticate without exposing the username and password.
- Using SSH to clone is much easier than typing the username and password all the time, and it is also a bit more secure.
These are the content of this article:
- A -Introduction
- B - Use SSH Protocol to clone
- C - Create Public and Private Keys
- D - Register Public Key in GitLab
- E - Use SSH to Clone with Keys
B - Use SSH Protocol to Clone
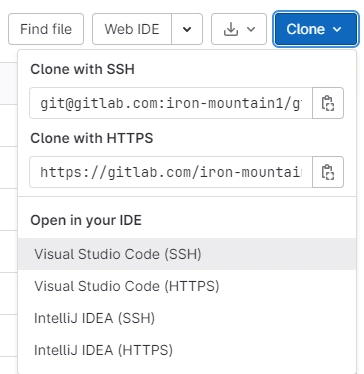
From the GitLab server, Click Clone:

Choose Visual Studio Code (SSH):
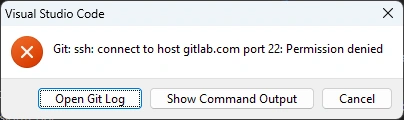
We got: Permission denied
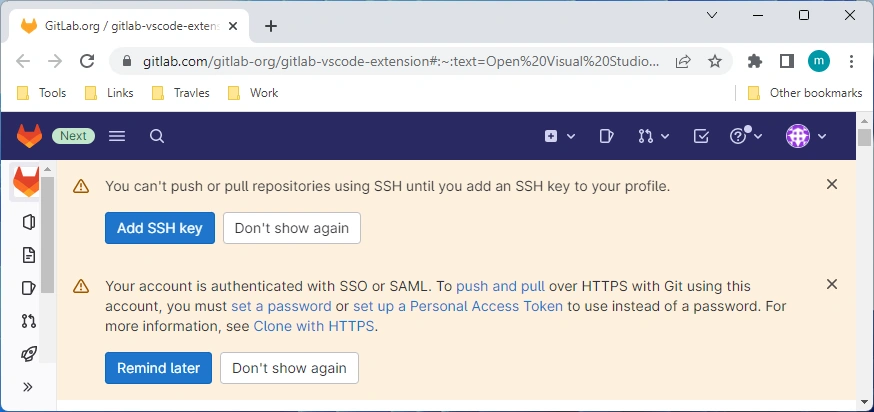
Because you need to add an SSH key to your profile before you make a clone:
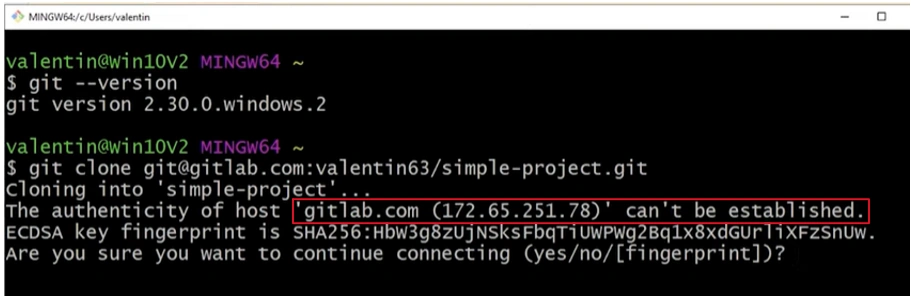
The same happens when you use the command line command to make a clone. Such as, you make clone by Command
clone [email protected]:valentin63/simple-project.git
The authentication cannot be established:
Due to permission denied (publickey,keyboard-interactive)
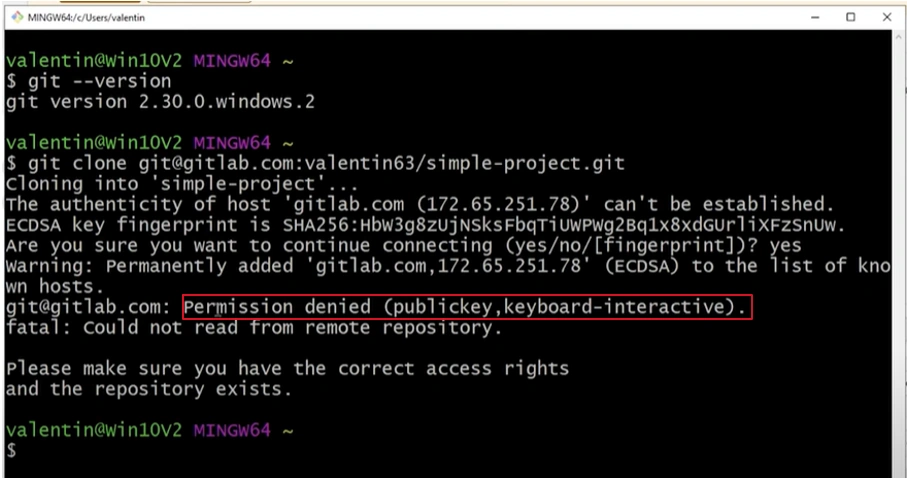
The prompt command line uses SSH protocol. Now, we need to create public and private keys first.
C - Create Public and Private Keys
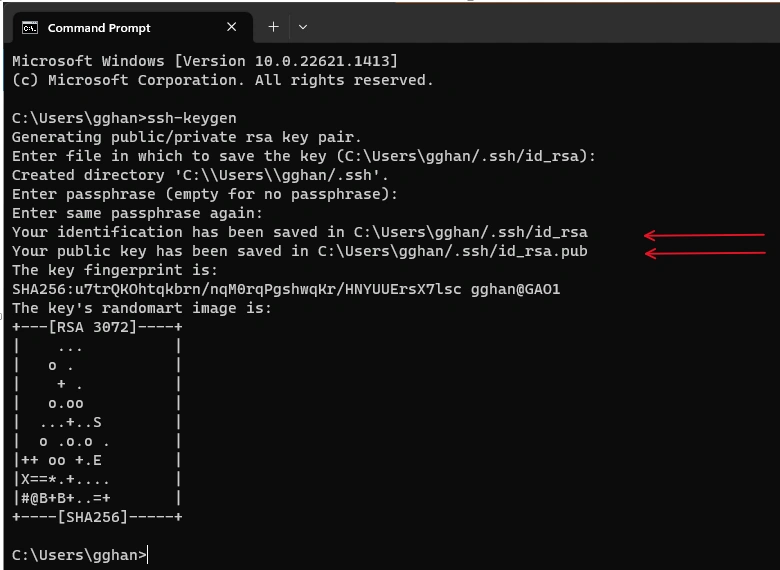
We use the command
ssh-keygen
to generate keys:
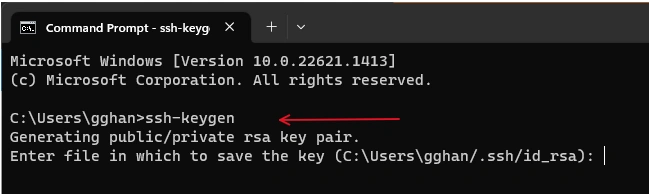
The prompt asks for the file in which to save the day, we use the default directory by Click Enter:
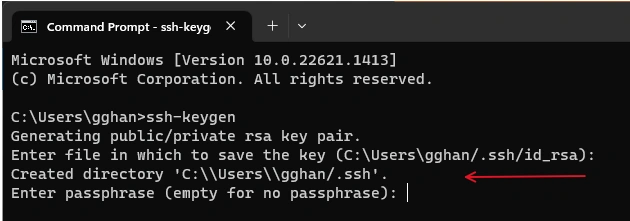
Then the directory is created.
The next step is to be asked for a passphrase so the private key can be additionally secured with a password. For simplicity reasons, I will not set the passphrase, but we need to understand the security risk if somebody gets access to the computer if your files are not encrypted. They can read this private key which will be stored here in id_rsa; then they can get access to your repositories without being asked for any password or anything like this.
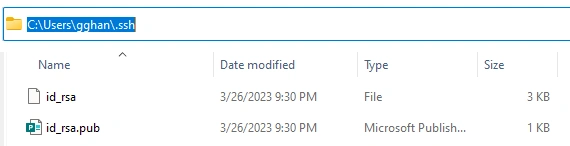
Enter, we got both public key and private key created:
In the folder id_rsa:
D - Register Public Key in GitLab
You may get the SSH Keys page in the GitLab server in two ways:
Click the button Add SSH Key:

If the screen is like this --- that is usually in the code page:
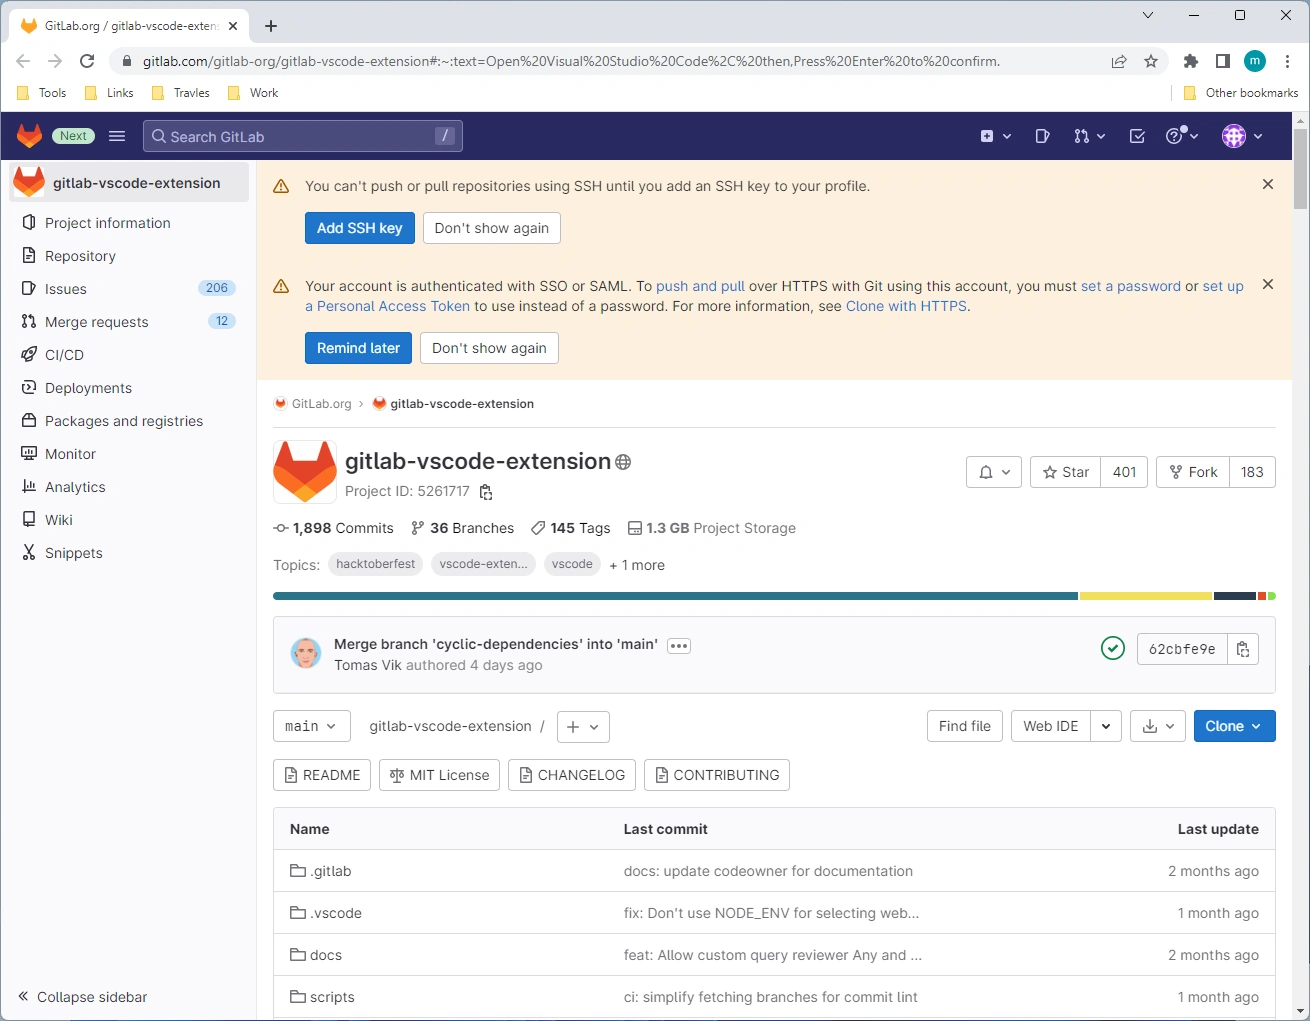
Otherwise, you can Click the right upper corner, the icon => preference
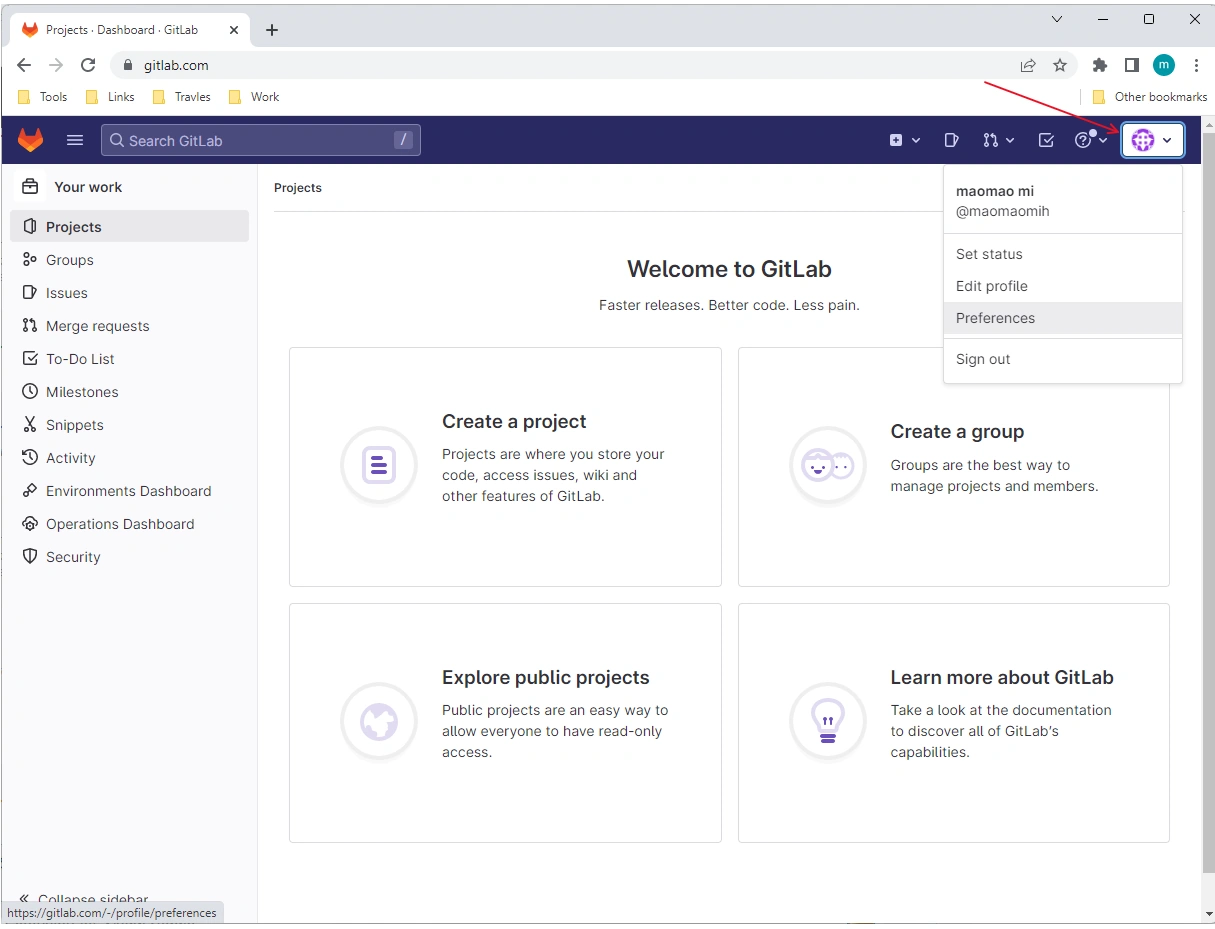
To get the User Settings page => Click SSH Keys:
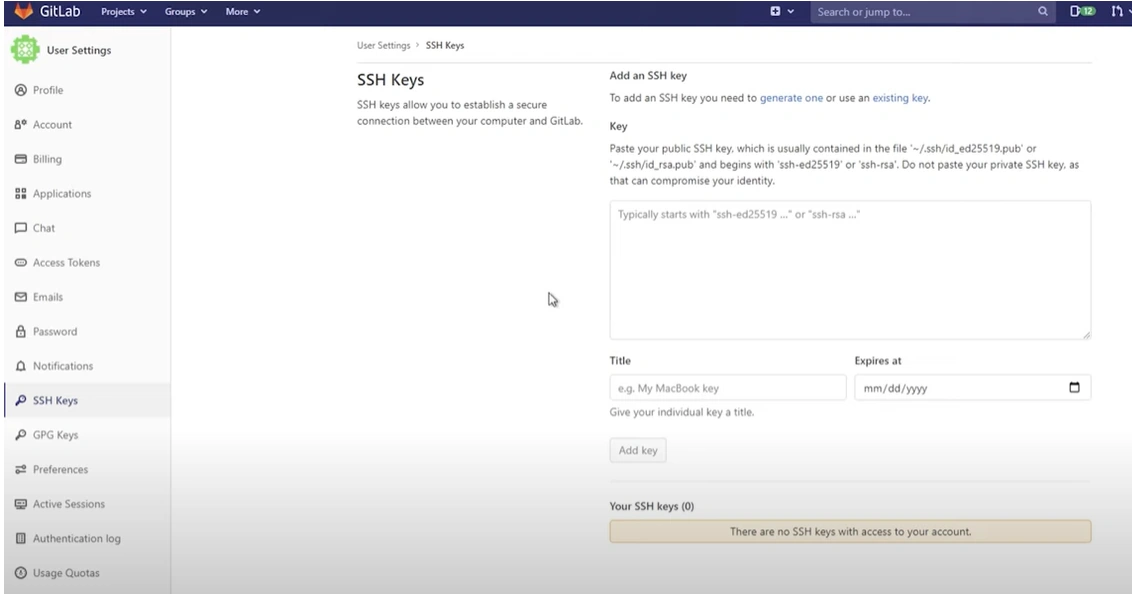
Copy and paste the Public Key here (Note, the private is always in your local and private)
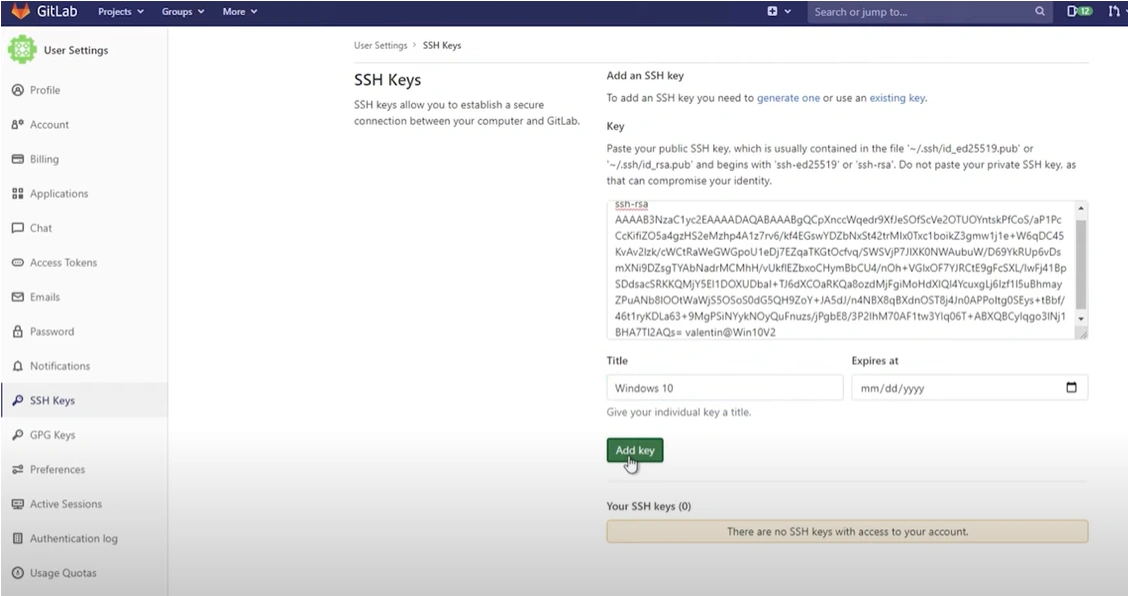
Give the Title name, and set the expired date (if you want the key permanently, just leave it blank). Click Add Key:
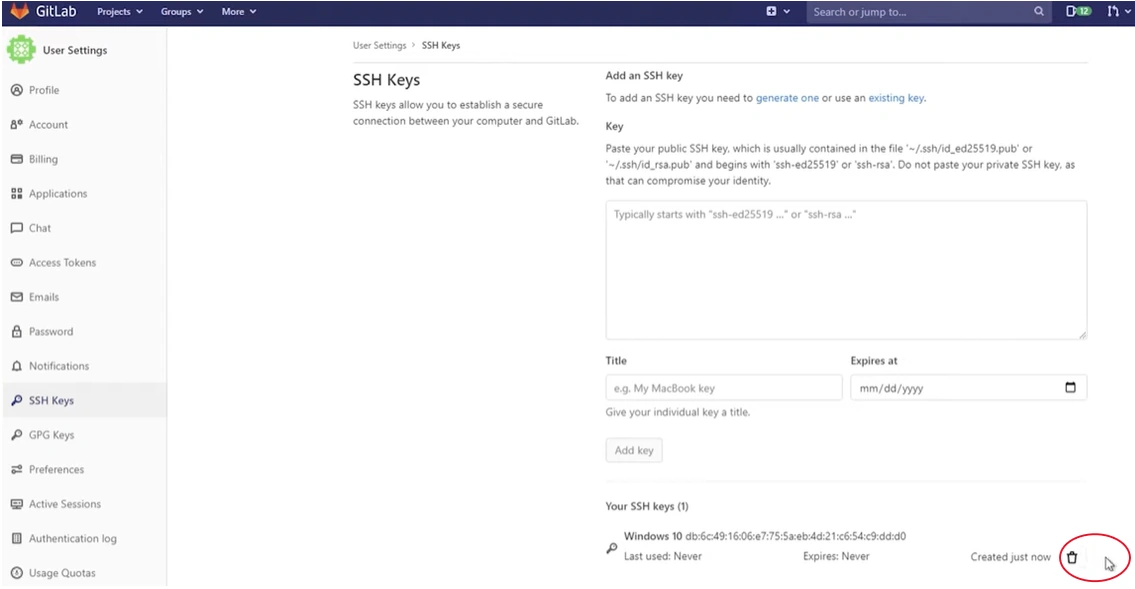
The key is added; if we want to remove it later, we can easily do it as above.
E - Use SSH to Make Clone with Keys
From the GitLab server, we make a clone by SSH:
It will be successful for sure; we got:
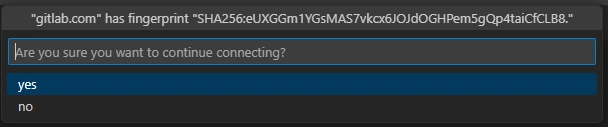
Yes, done.
From the command line, ruin the same command:
clone [email protected]:valentin63/simple-project.git
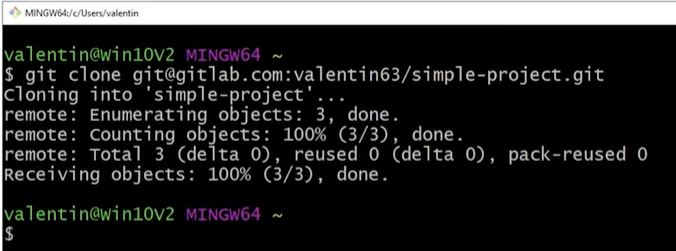
Done.
Reference
Join the conversation! Your thoughts help the community grow.