

INTRODUCTION
In this article, I am going to explain how to use a Rich TextBox in a Windows.Forms app using Visual Studio 2017.
STEP 1 - Create a new project
Let's create a new project using Visual Studio 2017.
Select New Project->Visual C#->Windows Forms App (.NET Framework), give your project a name and click OK.
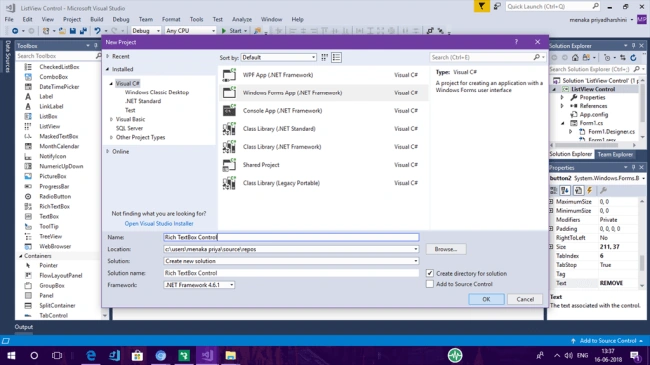
This action creates a WinForms project with a default form and you should see the Windows Designer.
STEP 2 - Drag and Drop Controls
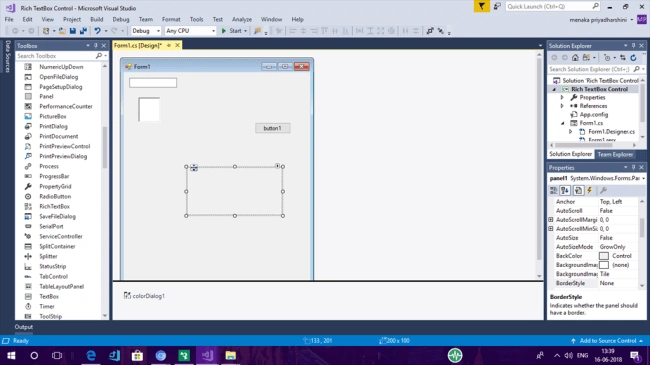
Let's add a Rich TextBox control to the form by dragging it from the Toolbox and dropping it to the form. You will see that a Rich TextBox1 is added to the form. This control is now available for you in the code behind.
Rich TextBox Control
In this article, I am going to explain how to use a Rich TextBox in a Windows.Forms app using Visual Studio 2017.
STEP 1 - Create a new project
Let's create a new project using Visual Studio 2017.
Select New Project->Visual C#->Windows Forms App (.NET Framework), give your project a name and click OK.
This action creates a WinForms project with a default form and you should see the Windows Designer.
STEP 2 - Drag and Drop Controls
Let's add a Rich TextBox control to the form by dragging it from the Toolbox and dropping it to the form. You will see that a Rich TextBox1 is added to the form. This control is now available for you in the code behind.
Rich TextBox Control
Rich TextBox has many formatting options. It applies the color, background colors, multiple fonts, and margins to the text. It adds more complexity than the regular Textbox.
SelectionBackColor
The SelectionBackColor property changes the currently selected text in the Rich TextBox to the background color you assign to it. If there is no current selection, then the caret is used to start the selection.
DetectUrls
When entering text in the Rich TextBox, sometimes a link to a Web Page will be entered. If we set the DetectUrls property to true, the Rich TextBox will add hyperlink styles to any possible link.
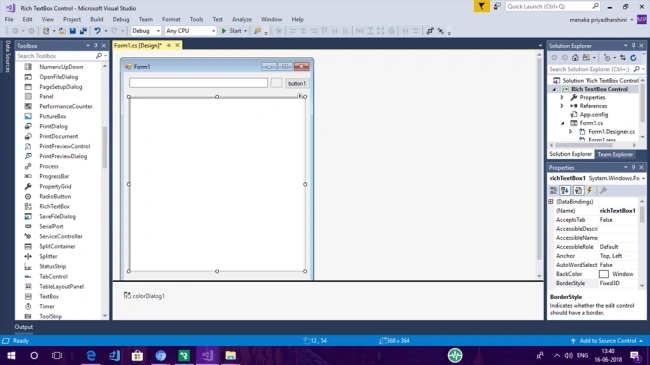
Now, let's add other controls, like Panel, Color Dialog, Textbox, Button control to the form by dragging these from the Toolbox. You may also want to change the properties of the other controls.
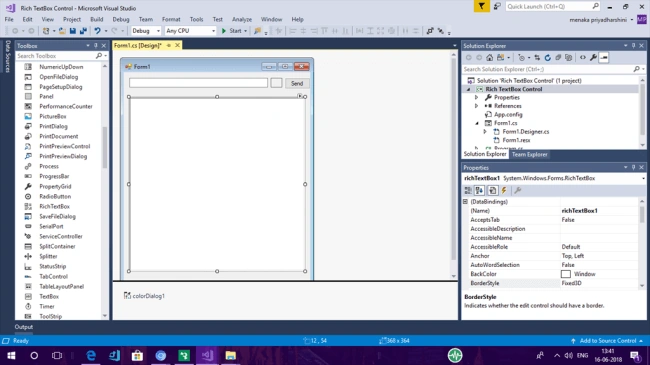
Change the text of other controls to what you like.
STEP 3 - Coding for Button Click Event
You can add a button-click event handler by simply double-clicking on the button control event handler. We can display the text in Rich TextBox.
DetectUrls
When entering text in the Rich TextBox, sometimes a link to a Web Page will be entered. If we set the DetectUrls property to true, the Rich TextBox will add hyperlink styles to any possible link.
Now, let's add other controls, like Panel, Color Dialog, Textbox, Button control to the form by dragging these from the Toolbox. You may also want to change the properties of the other controls.
Change the text of other controls to what you like.
STEP 3 - Coding for Button Click Event
You can add a button-click event handler by simply double-clicking on the button control event handler. We can display the text in Rich TextBox.
- public partial class Form1 : Form
- {
- public Form1()
- {
- InitializeComponent();
- }
- Color _color = Color.Blue;
- bool _first=true;
- private void button1_Click(object sender, EventArgs e)
- {
- richTextBox1.SelectionColor = _color;
- if (_first)
- richTextBox1.SelectedText = textBox1.Text;
- else
- richTextBox1.SelectedText = Environment.NewLine + textBox1.Text;
- _first = false;
- textBox1.Clear();
- textBox1.Focus();
- }
- private void panel1_Paint(object sender, PaintEventArgs e)
- {
- }
- private void panel1_Click(object sender, EventArgs e)
- {
- if(colorDialog1.ShowDialog()== DialogResult.OK)
- {
- _color = colorDialog1.Color;
- panel1.BackColor = _color;
- }
- }
- }
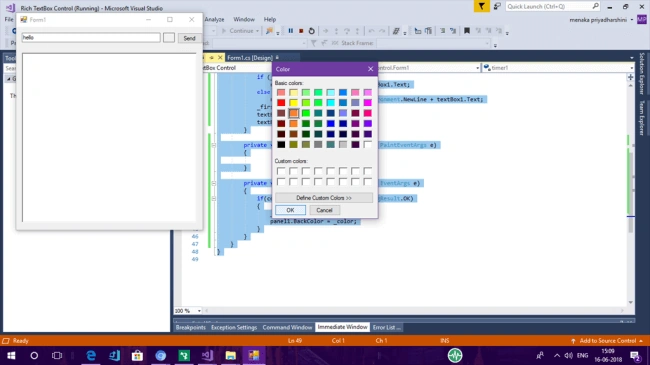
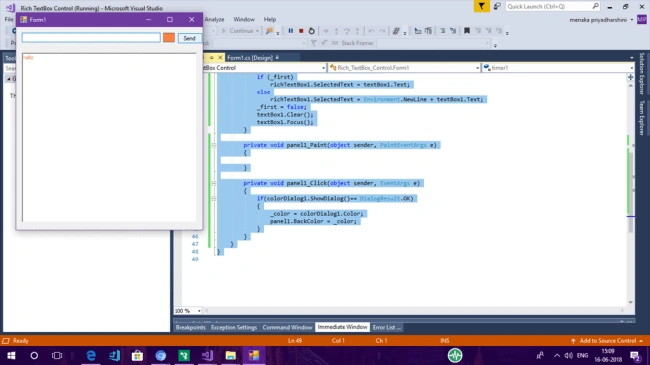
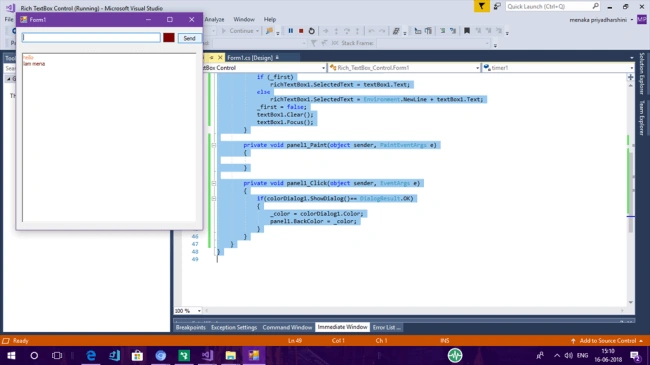
Now, simply compile and run the application. Enter the text in the Textbox. Click the panel control, a color selection window will be opened. Choose the color and click OK. After choosing the color, click the Send button. The text entered in the TextBox along with the color chosen will appear in the Rich TextBox.
Summary
In this basic article, you saw how to use a Rich TextBox control. Hope you found this article interesting. For any feedback, please post your comment at the bottom of this article. Thank you!.
Join the conversation! Your thoughts help the community grow.