Introduction
It has always been a little painful creating 3D animation using Microsoft DirectX... until now. True Vision 3D has created a nice wrapper around DirectX 9 to simplify the task of doing animation and game development in .NET. With this well defined game engine, you can get going creating moving objects right away. This article is based on a tutorial written by the author Fatima Ahmed describing how to use True Vision to create a furnished room.
Figure 1 - 3D Animation of Objects using DirectX, True Vision and .NET
Understanding the 3D World
There are a few concepts you will need to understand before tackling the world of 3D animation. Much of 3D design is based on the concept of meshes. Meshes are these wire frames described in terms of 3d vectors. You can think of a mesh as a bent up piece of chicken wire that forms the shape of the desirable object. A mesh is rendered from its vector components into a solid object using some fancy algorithms handled by Direct X. In order to give the "chicken wire" a more realistic look, the wire mesh is covered with a texture. Textures are simply bitmaps that fill in the polygons in the 3D mesh. In additions to textures and meshes, the 3D world has the concept of lighting in order to give objects an additional dimension. Colors in the scene are made lighter or darker to give the illusion of different concentrations of light. Developers often use programming tools such as 3D Studio, Lightwave 3D, or SoftImage to create meshes, textures, and other aspects of game development.
Thinking in True Vision
The concept behind DirectX (and wrapped nicely by True Vision) is that you create all these meshes as objects in your scene, and rotate, translate, color, or illuminate them separately. Anotherwords, the steps to animating meshes are this: change the meshes in your scene, render the whole scene. Then repeat: change the meshes in your scene, render the whole scene. When do you change the scene? You can change the scene in response to user input, or in response to a timer, or whatever event in your application is suitable for triggering a change.
The Program Structure
The application initializes the True Vision Engine at the time of the load event of the Windows Form. Inside the load event handler, we create all our mesh objects. Then we kick off the main loop. The main loop, which is common to all directx applications, just spins a loop that continously renders the scene filled with meshes. Rendering is handled in 3 steps: step 1) clear the previously rendered objects. step 2) render the new scene in memory 3) display the newly rendered scene on the screen. These steps continue to loop at a predetermined frame rate. The loop is exited only after the program sets the loop variable to false. In our program the loop variable is set to false when the user presses the exit button or closes the form.
Animation
In order to see some interesting animation from our mesh objects, we have to transform them. We added a routine inside the rendering loop that rotates some of the objects in our scene. You can rotate any mesh object in the scene that you want using True Vision, but we chose to rotate the dice and the sunglasses. This strange rotation of objects in the room gives you the illusion that the room is haunted. To animate, we just add a line inside the rendering loop that calls the method RotateSomeObjects. This method changes the position of the sunglasses and dice each time through the loop. At the current frame rate, the dice and sunglasses look like they are spinning.
The Code
Let's take a more detailed look at the code to understand what we talked about so far. Initialization takes place in the form load event. The first method, SetupTheInitialScene, sets up the engine, and creates the scene and all the mesh objects. The Main_Loop call starts the loop and asks the scene to render itself every time through the loop.
Listing 1 - Loading the Scene and starting the Main Loop
        private void Form1_Load(object sender, EventArgs e)
        {
            // set up the initial scene
            SetupTheInitialScene();

             // show the form and give it focus
             this.Show();
             this.Focus();

            // start up the main loop, setting the loop guard to ON
             DoLoop = true;
             Main_Loop();
} |
Let's take a look at these two methods. The SetupTheInitialScene in the form first calls the InitializeTrueVision method in our form which initializes the engine. Then the SetupTheInitialScene method sets up the lighting and textures to be used by the mesh shapes. Finally SetupTheInitialScene creates the walls and mesh shapes needed to render the scene as shown in listing 2:
Listing 2 - Setup the scene and create the mesh shapes in the room
private void SetupTheInitialScene()
{
// initialize true vision details
InitializeTrueVision();
// create a new scene
_scene = new TVScene();
// set the scene background color
_scene.SetSceneBackGround(0f, 0.3f, 0.9f);
// set the lighting of the scene
SetupLighting();
// Load Textures
LoadTextures();
// create wall
CreateWalls();
//Set the position of the room mesh
_meshRoom.SetPosition(x_move, y_move, z_move);
// create different shapes in the room
CreateMeshShapes();
} |
The InitializeTrueVision called from SetupTheInitialScene, initializes the true vision engine and sets up texture and mesh path information. This method also points the engine to render inside the picturebox in our form. As you can see, initialization of the True Vision framework is pretty sttraightfoward with just a few lines of code.
Listing 3 - Initializes the True Vision Engine
void InitializeTrueVision()
{
// create a new game engine
TV = new TVEngine();
// set the engine to point the picture box so all rendering will
// occur inside the picture box in the form
TV.Init3DWindowedMode(this.pictureBox1.Handle.ToInt32(), true);
//This is the path where our media (texture and meshes) files are placed
TV.SetSearchDirectory(System.Windows.Forms.Application.ExecutablePath);
// set the rotation angle to be in degrees
TV.SetAngleSystem(CONST_TV_ANGLE.TV_ANGLE_DEGREE);
// We want to see the frames per second
TV.DisplayFPS = true;
}
|
The LoadTextures method called from SetupTheInitialScene brings in all the textures used in the scene as shown in listing 4. Textures are bitmaps such as jpg or bmp files. You only need to refer to the texture file's relative path because in Listing 3 we already told the engine what the search path for media would be. The call which loads the texture assigns a keyword so the texture can be referred to in the code by the keyword. For example the marble.jpg texture file loaded into the scene is assigned the keyword "marble".
Listing 4 - Loading the Textures into the Scene
private void LoadTextures()
{
_scene.LoadTexture("textures\\marble.jpg", -1, -1, "marble");
_scene.LoadTexture("textures\\cinder.bmp", -1, -1, "wood");
_scene.LoadTexture("textures\\granite.bmp", -1, -1, "granite");
_scene.LoadTexture("textures\\metal.bmp", -1, -1, "metal");
_scene.LoadTexture("textures\\sandstone.bmp", -1, -1, "sandstone");
_scene.LoadTexture("textures\\oldrock.bmp", -1, -1, "oldrock");
}
|
Now that we have our textures, we are ready to create our mesh shapes. First we will create the room walls. Lucky for us, the True Vision engine has built-in methods to handle the creating of walls as shown in listing 5. We simply use the AddWall3D method. This method takes the texture as its first parameter. The texture id is looked up through the keyword we assigned in listing 4. Our walls are all cinder blocks, so we will bring in the cinder block texture. The next 4 parameters in the AddWall3D method specify the x and z 3d coordinate positions defining the wall rectangle. The last two parameters specify the tile dimensions of the texture. There is a separate call to draw the floor called AddFloor and before you know it we have a room! Listing 5 shows the calls for creating a mesh room and figure 2 shows the rendered result. (Note the room isn't actually rendered until the Main_Loop).
Listing 5 - Creating the room walls using the True Vision Engine
private void CreateWalls()
{
// create a new mesh object and call it "room
_meshRoom = (TVMeshClass)_scene.CreateMeshBuilder("room");
// add the walls to the room
_meshRoom.AddWall3D(global.GetTex("cinder"), 350.0f, -350.0f, -350.0f, -350.0f, 350.0f, 5.0f, true, false, -50.0f, 5.0f, 5.0f);
_meshRoom.AddWall3D(global.GetTex("cinder"), -350.0f, -350.0f, -350.0f, 350.0f, 350.0f, 5.0f, true, false, -50.0f, 5.0f, 5.0f);
_meshRoom.AddWall3D(global.GetTex("cinder"), -350.0f, 350.0f, 350.0f, 350.0f, 350.0f, 5.0f, true, false, -50.0f, 5.0f, 5.0f);
_meshRoom.AddWall3D(global.GetTex("cinder"), 350.0f, 350.0f, 350.0f, -350.0f, 350.0f, 5.0f, true, false, -50.0f, 5.0f, 5.0f);
_meshRoom.AddFloor(global.GetTex("sandstone"), -350.0f, -350 - 0f, 350.0f, 350.0f, -50.0f, 10.0f, 10.0f, true, false);
} |
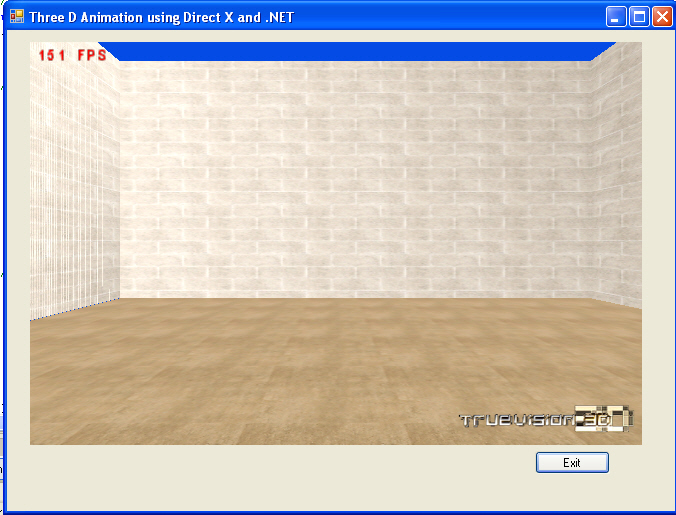
Figure 2 - The Rendered Room
Now let's see how to create all the cool shapes in our room. Listing 6 creates all the shapes in our room: 2 chairs, 2 dice, a table, a sphere, and a pair of sunglasses.
Listing 6 - Creating the interesting mesh shapes inside the Room
private void CreateMeshShapes()
{
// create a table with a transparent tabletop
CreateMeshTable();
// create a chair
CreateChair1();
// create another chair
CreateChair2();
// create dice
CreateDie1();
CreateDie2();
// create sunglasses and place them on the table by adjusting the position
CreateSunglasses();
// create a sphere inside the sunglasses
CreateSphere();
}
|
In order to create a shape, we just need to load an existing mesh object from a file, perhaps give it a texture, and set its position in the room. The mesh file format for direct x is the x file format (sounds a bit like TV show). The extension of this format is .x and is used for creating games for the X-Box and other DirectX applications. True Vision also excepts the 3d studio (3ds) format, but our example uses X meshes. Let's see how we create a mesh object for the table. First we create a mesh object, this can be done directly from the scene the CreateMeshBuilder method. Next we load the X file from our meshes directory and place it at the desired x,y,z coordinates in the room (using SetPosition). We want to size and rearrange the table a bit, so we scale it by a factor of 3 and turn it 25 degrees. Finally we apply the sandstone texture to the table by calling SetTexture as in Listing 7.
Listing 7 - Creating the mesh table, size it, rotate it, and apply a texture
|
private void CreateMeshTable()
{
// create a mesh object called table
_meshTable = (TVMeshClass)_scene.CreateMeshBuilder("table");
// load the object from an x file
_meshTable.LoadXFile(@"meshes\glasstable.x", true, true);
// set its position
_meshTable.SetPosition(80.0f, -50.0f, 340.0f);
// make the table 3x larger
_meshTable.ScaleMesh(3, 3, 3);
// rotate it 25 degrees around the Y 3D Axis
_meshTable.RotateY(25, true);
// set the tables texture to sandstone
_meshTable.SetTexture(global.GetTex("sandstone"), -1);
}
|
All mesh objects are created in a similar way. They are just loaded from there corresponding x files. For example, the sunglasses are from the sunglass.x file and placed on top of the table by putting them in the same position as the table.
Listing 8 - Creates the Sunglasses to be Rendered
|
private void CreateSunglasses()
{
_sunglasses =
(TVMeshClass)_scene.CreateMeshBuilder("sunglasses");
_sunglasses.LoadXFile(@"meshes\sunglass.x", true, true);
// place glasses in the same place as the table,
// and it will appear
// as if they are resting on top of the table
_sunglasses.SetPosition(80f, -40.0f, 310.0f);
_sunglasses.RotateY(25, true);
_sunglasses.ScaleMesh(15, 15, 15);
} |
When you are creating these scenes, you'll find you might need to play around with the coordinates and mesh sizes to get the scene the way you want it. For example, placing the sunglasses at a different y coordinate makes it look like the sunglasses are floating above the table. Another words, changing SetPosition to
| _sunglasses.SetPosition(80f, 100.0f, 310.0f); |
Renders the scene shown below:
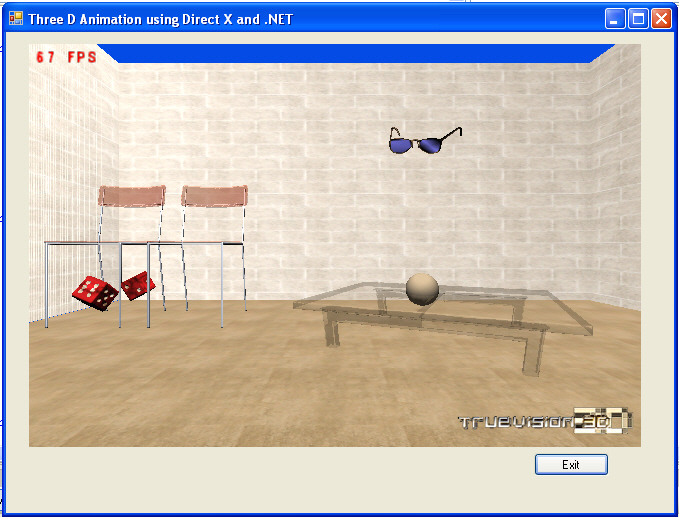
Figure 3 - Changing the y Coordinate Position of the Sun Glasses
The Main Loop
The main loop consists of a simple loop that just continually renders the scene until the guard condition (DoLoop) is set to false . It is in this loop that you can capture input from the user, check for collisions between objects, implement state machines, and animate objects. In our application we have inserted the call RotateSomeObjects into our main loop to make things slightly interesting by animating some of the mesh objects on the screen.
Listing 9 - The Main Loop that Renders the Mesh objects each time through the loop to Produce the Scene
|
private void Main_Loop()
{
int fps;
// We loop through all of this over and over until the DoLoop isn't True.
while (DoLoop == true)
{
// allow normal window events to take place
System.Windows.Forms.Application.DoEvents();
// for games, we would add input and movement checks here
// CheckInput();
// CheckMovement();
//Get the Frame per Second
fps = (int)TV.GetFPS();
// rendering is started by clearing the image
TV.Clear(false);
// rotate some of the objects set up in the form load
RotateSomeObjects();
// render all the mesh objects inside the scene in memory
_scene.RenderAllMeshes(true);
// display the rendered objects on the screen
TV.RenderToScreen();
}
// We ask to quit.
Main_Quit();
} |
RotateSomeObjects rotates the dice and the glasses. One dice appears to rotate along its length, while the other appears to rotate along its vertices. The sunglasses look as though they are rotating around the sphere.
Listing 10 - Animating some of the Mesh Objects
|
private void RotateSomeObjects()
{
// rotate first die around the X Axis 5 more degrees
_die1.RotateX(5, true);
// rotate second die around the X Axis and Z Axis
_die2.RotateX(5, true);
_die2.RotateZ(5, true);
// rotate the sunglasses around the Y Axis
_sunglasses.RotateY(5, true);
} |
Dealing with Input
Perhaps we want to allow the user to stop the sunglasses or die from rotating. To do this, we need to get user input. We can use the True Vision TVInputEngine object to get input from the keyboard or the mouse in order to control the rendering on the screen. As an example, let's allow the user to stop the sunglasses from spinning if the user types 'S' and stop the dice from spinning if the user types 'D'. If the user types 'R', the dice and the sunglasses will both start spinning again. If we uncomment CheckInput from the main loop we can check the user input each cycle through the loop. The CheckInput method would use the Input Method to set flags that will control rendering as shown in listing 11.
Listing 11 - Check the Input and Set the Flags that Control the Rendering in RotateSomeObjects
|
TVInputEngine InputEngine = new TVInputEngine(); // constructs the input engine
private void CheckInput()
{
// check if we want to stop the sunglasses
if (InputEngine.IsKeyPressed(CONST_TV_KEY.TV_KEY_S))
_rotateGlasses = false; // stop the glasses
// check if we want to stop the die
if (InputEngine.IsKeyPressed(CONST_TV_KEY.TV_KEY_D))
_rotateDie = false; // stop the die
if (InputEngine.IsKeyPressed(CONST_TV_KEY.TV_KEY_R))
{
// restart both glasses and die
_rotateGlasses = true;
_rotateDie = true;
}
} |
Now we just need to slightly alter the RotateSomeObjects method in listing 10 to respond to the _rotateGlasses and _rotateDie flags.
Listing 12 - The Altered RotateSomeObjects Method that Rotate Objects according to Input Settings
|
void RotateSomeObjects()
{
// rotate first die around the X Axis if die flag is set
if (_rotateDie)
{
_die1.RotateX(5, true);
// rotate second die around the X Axis and Z Axis
_die2.RotateX(5, true);
_die2.RotateZ(5, true);
}
// rotate the sunglasses around the Y Axis if sunglasses flag is set
if (_rotateGlasses)
{
_sunglasses.RotateY(5, true);
}
} |
Conclusion
DirectX has never been easy to program. The True Vision library makes a great attempt at simplifying the use of DirectX 9 with a well thought out .NET library. In this article we have shown you how to use True Vision's engine to create a scene and render it to the screen. We have given you some insight into how to create 3D animation, and we have shown you how you can take advantage of True Visions Input Engine to control the animation. Hopefully this article will get you started in creating your own great games or creative visions in the world of .NET.
References
True Vision 3D SDK 6,2
Creating an Interactive 3D World with C# and .NET by Fatima Ahmed