

I am going to write my second article here, recently we had a situation in our project. We wanted to send SMS to our customer before 2 hours and 24 hours of appointment, after a good research I found that Azure scheduler is the best possible way to do this operation.
Windows Azure Scheduler allow you to invoke actions – such as calling HTTP/S endpoints or posting a message to a storage queue on any schedule. With Scheduler, you create jobs in the cloud that reliably call services both inside and outside of Windows Azure and run those jobs on demand, on a regularly recurring schedule, or designate them for a future date.
This article will explain you how to create Job using Windows Azure Scheduler
New Job
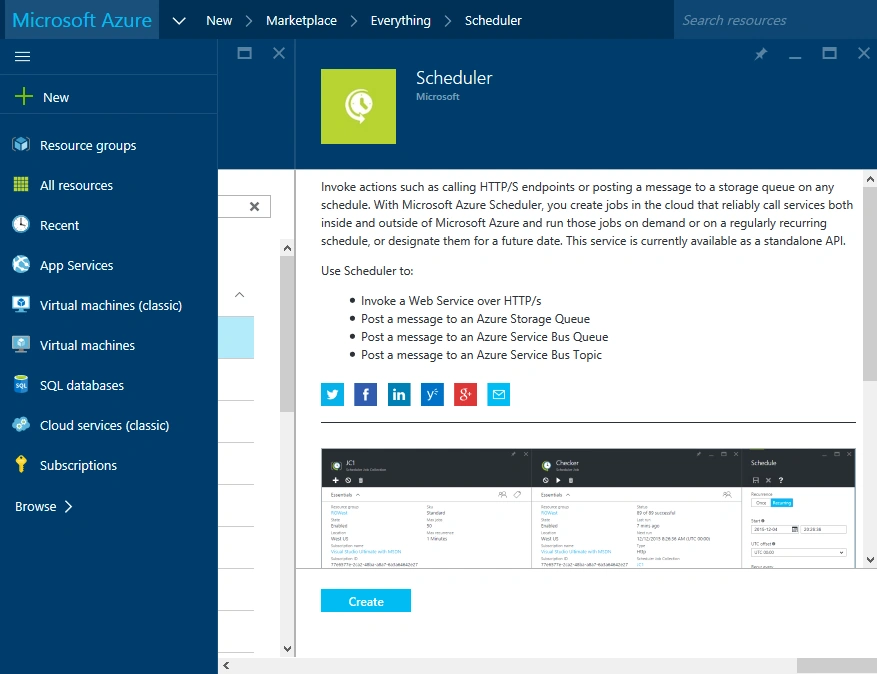
In Windows Azure management portal click on New, search scheduler, click Scheduler and then press Create button.
Give scheduler a name. Here we are using name GetMessage
Click on Job collection, give a name of your job collections. Here we are using name GetMessageJob here,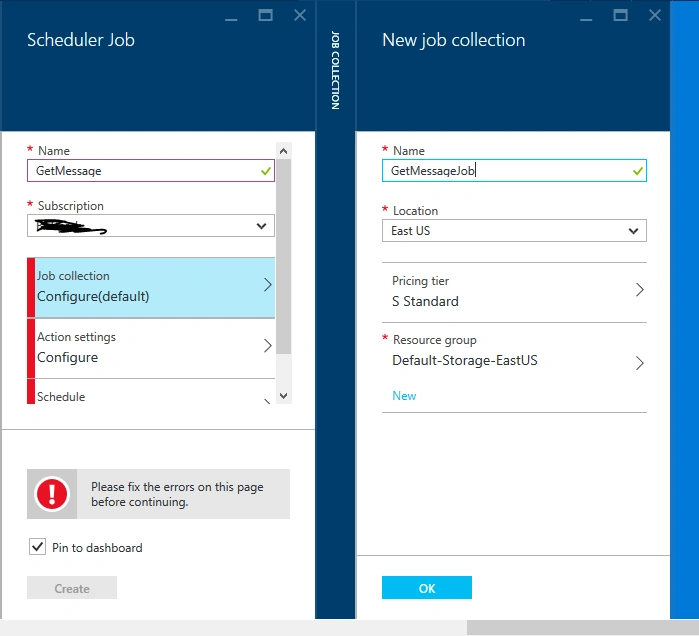
Once your Job collection is done we need to set what action we want to use for this scheduler.
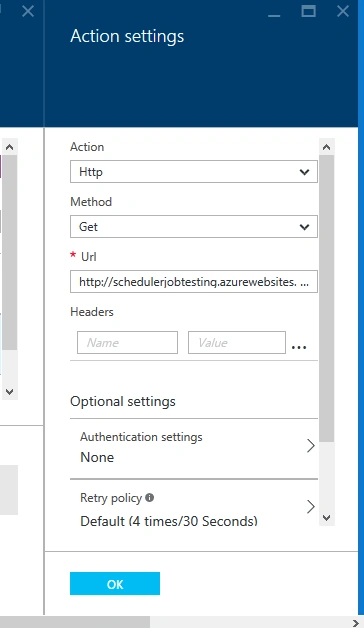
I created a custom website http://schedulerjobtesting.azurewebsites.net/ in windows azure portal, we will host our API here to test scheduler.
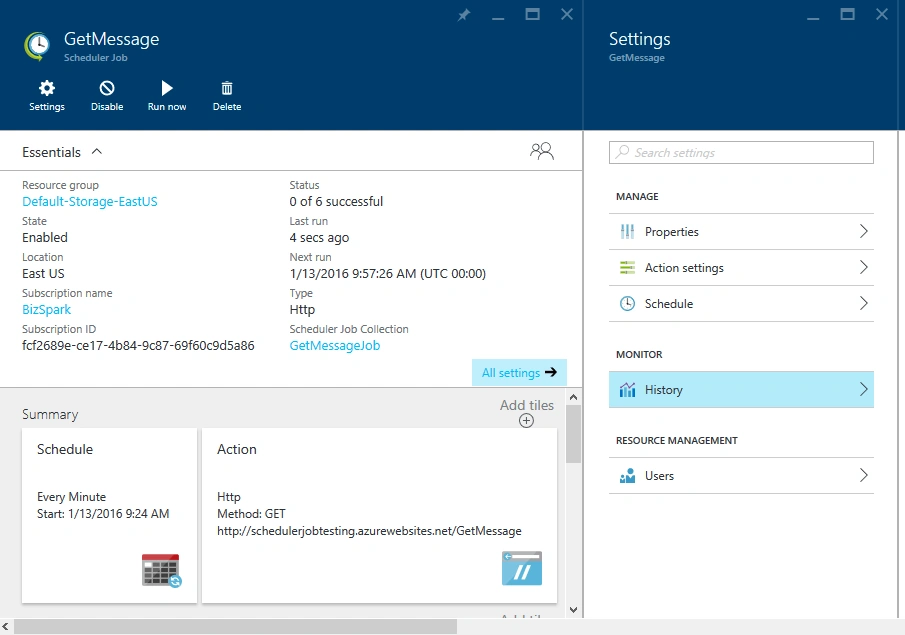
Once Job is configured now you can move to third step that is called Recurrence. Here you can setup it once or many time based on given options. If you notice the following screenshot I am starting this right now and this Job will run in every one minute.
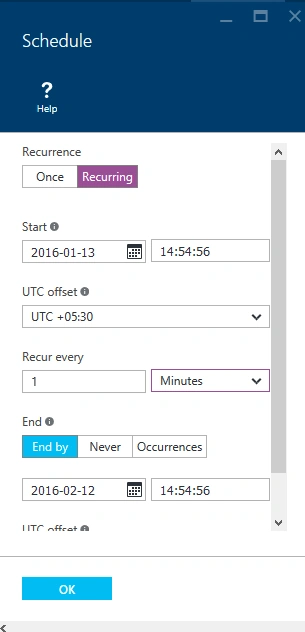
Once your options are filled correctly, you can click on create and it will deploy your Job at azure.
Job Information
Once your Job deployed successfully you can go to management portal and find our Job as shown below,
Job History
Since our scheduler is running for every minute we can look for Job history. Now, please check the following image,
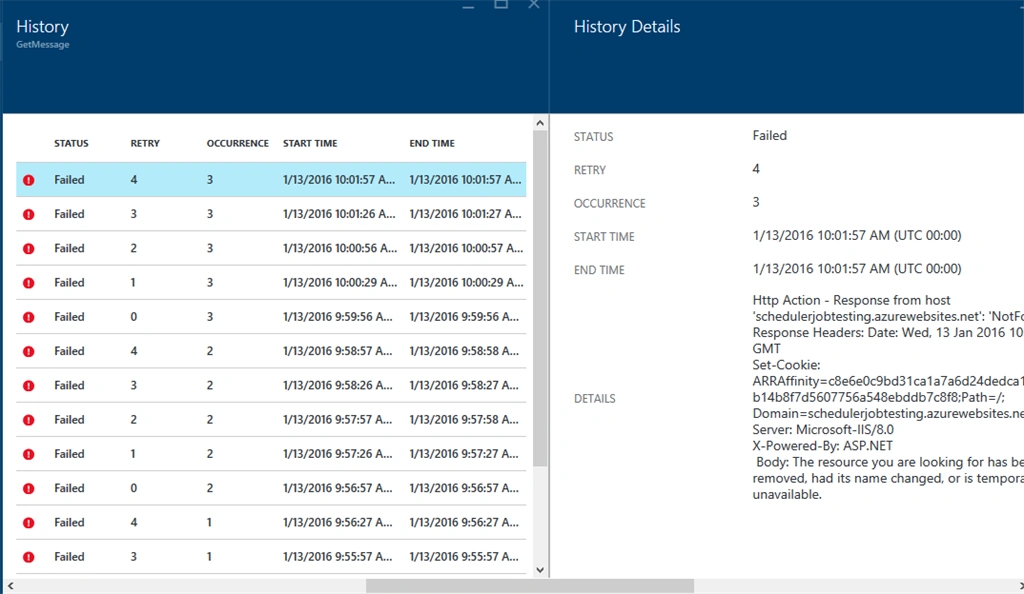
If you notice scheduler failed because we did not hosted it yet. When you select one of the jobs you can click on History Details to get details about the exact response you received. Remember we created a website called http://schedulerjobtesting.azurewebsites.net/ and now we are going to host an API http://schedulerjobtesting.azurewebsites.net/api/Message/GetServertime/ to make it work.
Please use the following code and host it, you can consider any API and use it.
- public class MessageController: ApiController
- {
- [HttpGet()]
- public object GetServerTime()
- {
- return DateTime.Now.ToLocalTime();
- }
- }
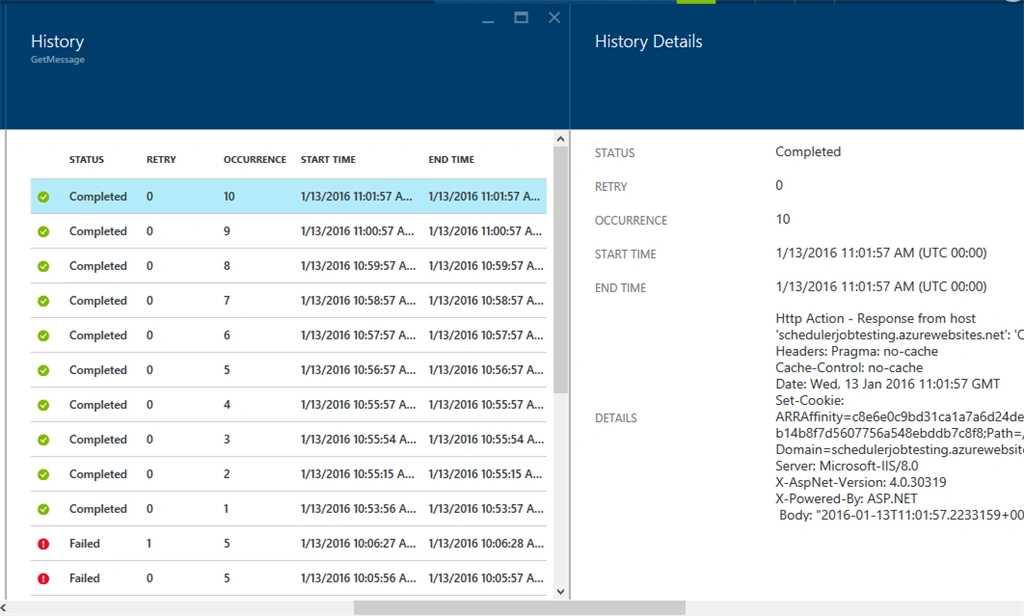
Conclusion:
In this article, I mentioned only HTTP GET; you can use post, scheduler for sending SMS, email, etc. This can be really useful if you have tasks that run every X days/month.
Bhavik PatelPosted Apr 27, 2016, 9:22 PM
good share
Nitin PanditPosted Apr 11, 2016, 2:57 PM
yes it's really great sir :)
Sourabh SomaniPosted Apr 4, 2016, 11:44 AM
Great sir. This is Awesome :)
Ravi PatelPosted Jan 14, 2016, 5:31 AM
ohh great sir its working
Ravi PatelPosted Jan 14, 2016, 4:49 AM
thanks for this great article !!
Sthitaprajnya Debasis NayakPosted Jan 14, 2016, 1:30 AM
Nice Article !!!
Ankit BansalPosted Jan 14, 2016, 12:12 AM
thanks for sharing..keep it up
Humayun Kabir MamunPosted Jan 13, 2016, 10:43 PM
Nice...