

Introduction
In my previous article, I explained about Bluetooth Connection using Arduino and in this article, I'll show you working with Arduino Uno using Windows Form Application.
Requirements
- Arduino Uno
- Led
- Arduino IDE
- Visual Studio IDE
Connection
Anode Pin(+) to 3
Cathode Pin(-) to Gnd
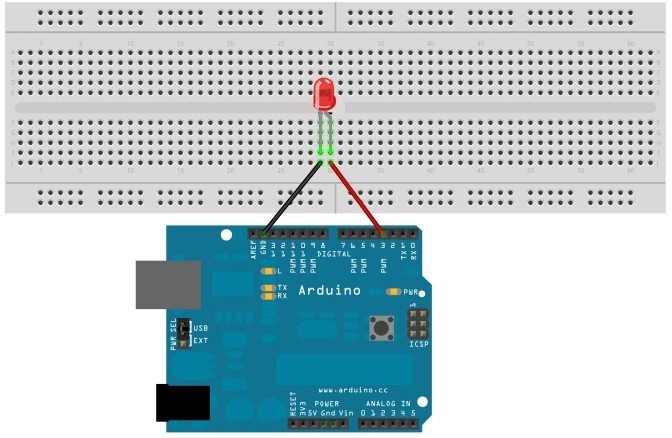
Programming
Arduino: You can refer my first article for explanation.
- int led = 3;
- void setup()
- {
- Serial.begin(9600); //Baud Rate
- pinMode(led, OUTPUT);
- }
- void loop()
- {
- char data = Serial.read();
- switch (data) //Selection Control Statement
- {
- case 'ON':
- digitalWrite(led, HIGH); // Sets the led ON
- break;
- case 'OFF':
- digitalWrite(led, LOW); //Sets the led OFF
- break;
- }
- }
Windows Form:
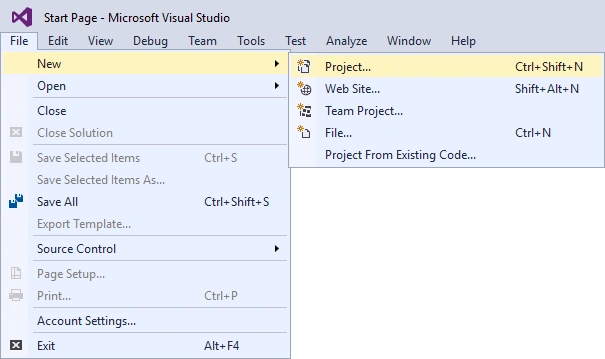
Step 1: Once Visual Studio Community 2015 and select FILE, then New, Project… from the Menu.
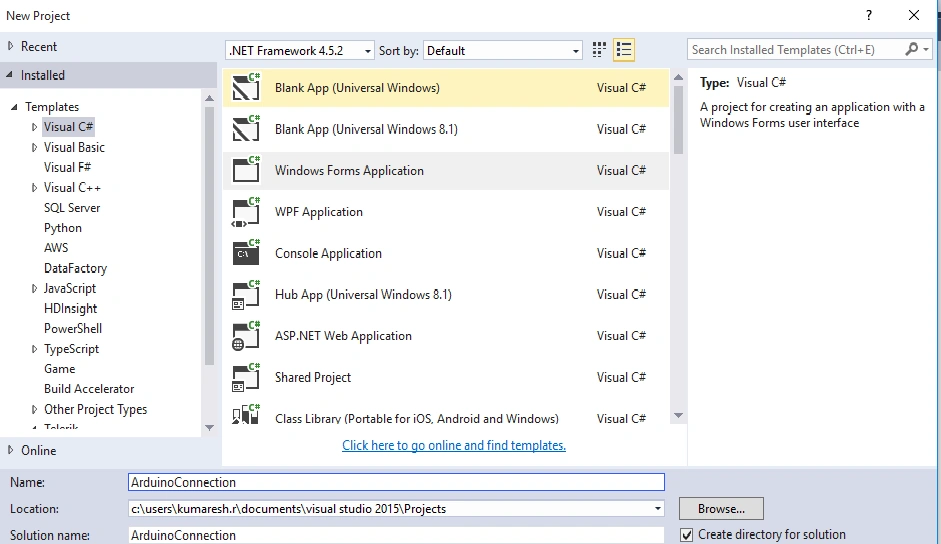
Step 2: From the New Project window select Visual C# from Installed, Templates, then select Windows Form Application.
Step 3: Drag and drop the buttons in the designer window named ONLED and OFFLED.
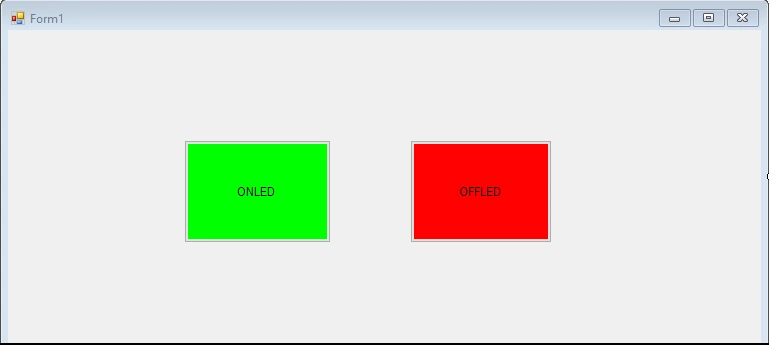
Step 4: And drag and drop the SerialPort Tool in the designer window and it will hide one.

Step 5: Start coding.
- using System;
- using System.Windows.Forms;
- using System.IO.Ports;
- namespace ArduinoConnection
- {
- public partial class Form1 : Form
- {
- private SerialPort newport;
- public Form1()
- {
- InitializeComponent();
- Code();
- }
- private void Code()
- {
- newport = new SerialPort();
- newport.BaudRate = 9600;
- newport.PortName = "COM4";
- newport.Open();
- button1.Enabled = true;
- button2.Enabled = false;
- }
- private void button1_Click(object sender, EventArgs e) //Click Event For LEDON
- {
- newport.WriteLine("ON"); // LED ON
- button1.Enabled = false;
- button2.Enabled = true;
- }
- private void button2_Click(object sender, EventArgs e) //Click Event For LEDOFF
- {
- newport.WriteLine("OFF"); // LED OFF
- button1.Enabled = true;
- button2.Enabled = false;
- }
- }
- }
Explanation
- using System.IO.Ports is a Namespace
- Create the object named as newport
- newport = new SerialPort(); //Intialize the new instance of Serial Port Class
- newport.BaudRate = 9600; //Set the Serial Baud Rate for transforming the data
- newport.PortName = "COM4"; //Set the COM Port
- newport.Open(); //Port Open
- button1.Enabled = true; // Conditions that true means Ledon
- button2.Enabled = false; // Ledoff
Conclusion
We saw working with Arduino using Windows Form Application
Humayun Kabir MamunPosted Jan 24, 2016, 11:00 PM
Nice...
Pooja BaraskarPosted Jan 24, 2016, 4:33 AM
Nicely explained, you made things easy.
Sr KarthigaPosted Jan 23, 2016, 5:24 AM
Good one
Santhakumar MunuswamyPosted Jan 23, 2016, 2:01 AM
Thanks for nice article. Keep it up
Kumaresh RajalingamPosted Jan 22, 2016, 9:31 PM
Thank you Gowtham sir
Gowtham KPosted Jan 22, 2016, 9:12 PM
Good One, Thanks for sharing:)
Jaco ZwartsPosted Jan 22, 2016, 12:00 PM
Really Good thank you for sharing, I am looking to get my self an Arduino