

Introduction
Wishing you all a very Happy Pongal and Makara Sankrathii.
In my previous article,
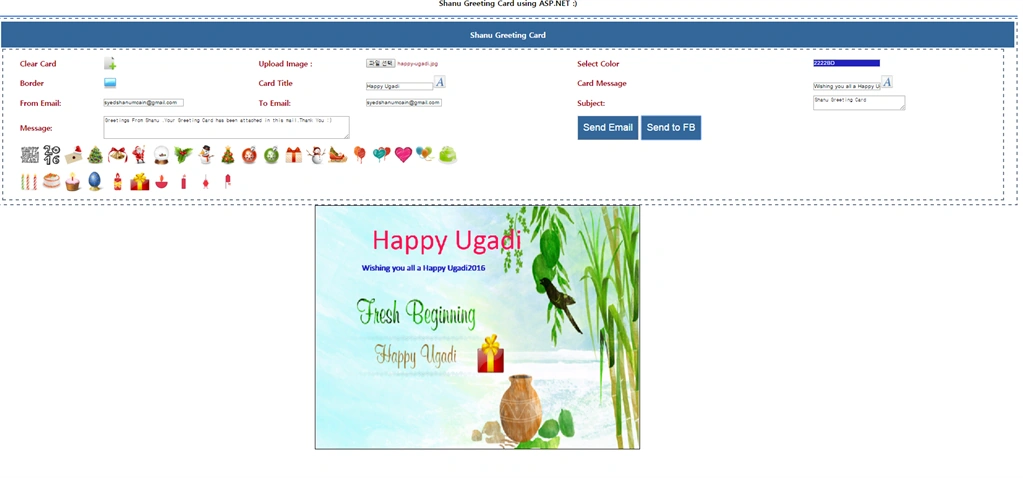
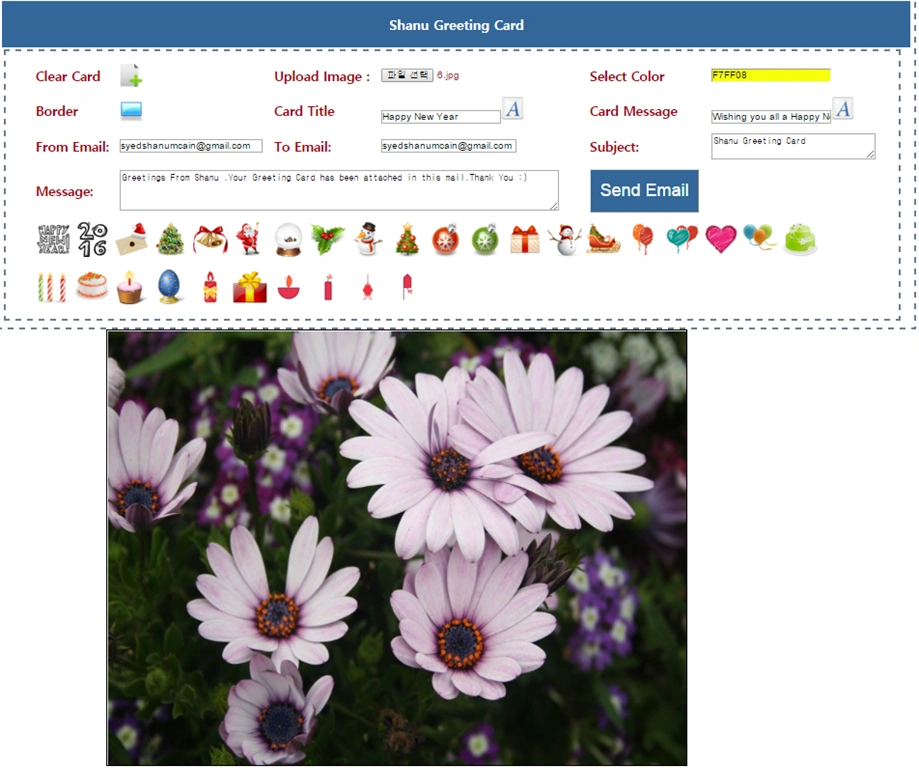
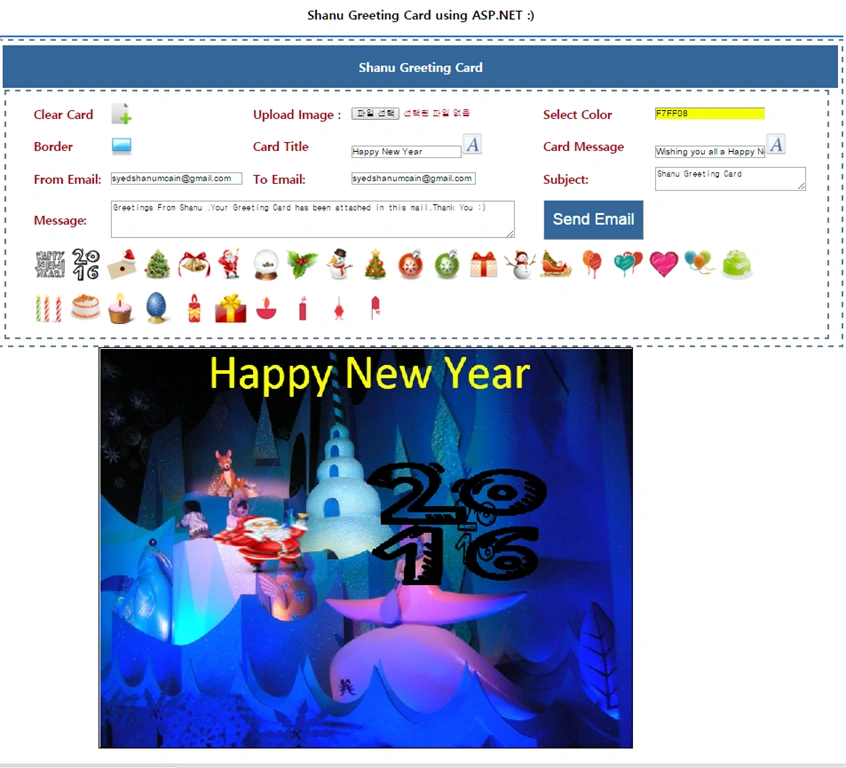
This article shows the details of how to do the following.

- Clear Card: Clear the card to design new.
- Add Image: Upload Image to Canvas Tag (You can add any image to create your Greeting Card).
- Add Sticker: Add stickers, for example balloon, flowers, and so on to our Greeting Card for decoration.
- Select Color: The selected color can be applied to Card Border and Text.
- Add Border: Add a border to the Greeting Card.
- Card Title: Add Greeting Card Title. For example, “Happy New Year”.
- Card Message: You can add your own wishes to the Greeting card.
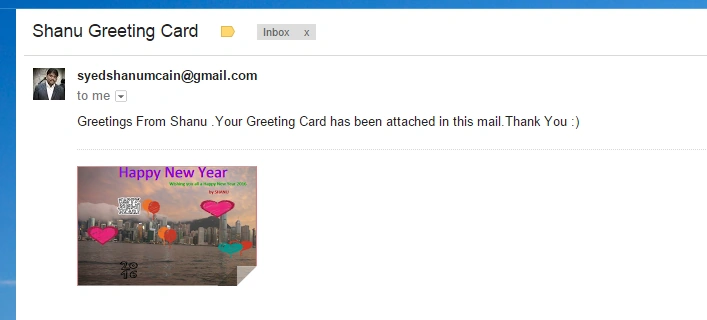
- Save and Send to Email: The final created Greeting Card can be saved to the application root folder. Also, send the card to a user entered email address.
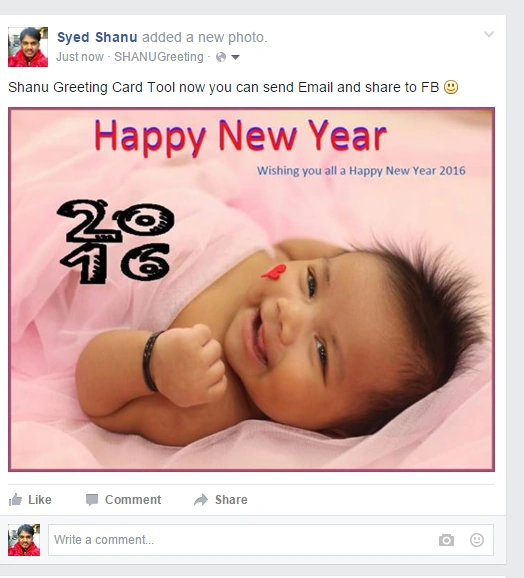
- Post Canvas Greeting Card to Facebook. The Final Edited Greeting Card can be posted to Facebook.
Visual Studio 2015: You can download it from here.
Using the code
The main purpose is to make the program very simple and easy to use. All the functions have been well commented in the project .Here we will see the procedure to create a Web Greeting Card tool using a HTML 5 canvas.
HTML5
HTML5 is the new version of HTML. HTML5 has cross-platform support. That means HTML5 can work on a PC, Tablet and a Smartphone. HTML5 should be started with a DOCTYPE, for example:
Some of the new features in HTML5 are CANVAS, AUDIO, and VIDEO and so on.
CANVAS
CANVAS is the element for 2D drawings using JavaScript. The Canvas has methods such as drawing paths, rectangles, arcs, text and so on. The Canvas element looks like the following.
- <canvas id="canvas" width="400" height="400"></canvas>
Create your Web Application in Visual Studio 2015
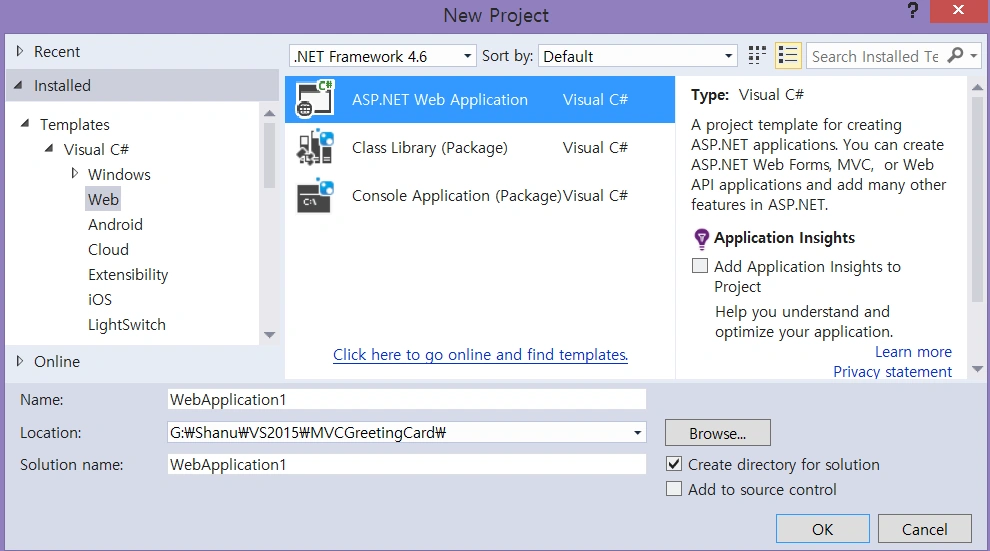
After installing our Visual Studio 2015 click Start, then Programs and select Visual Studio 2015 - Click Visual Studio 2015. Click New, then Project, select Web and select ASP.NET Web Application. Enter your Project Name and click OK.
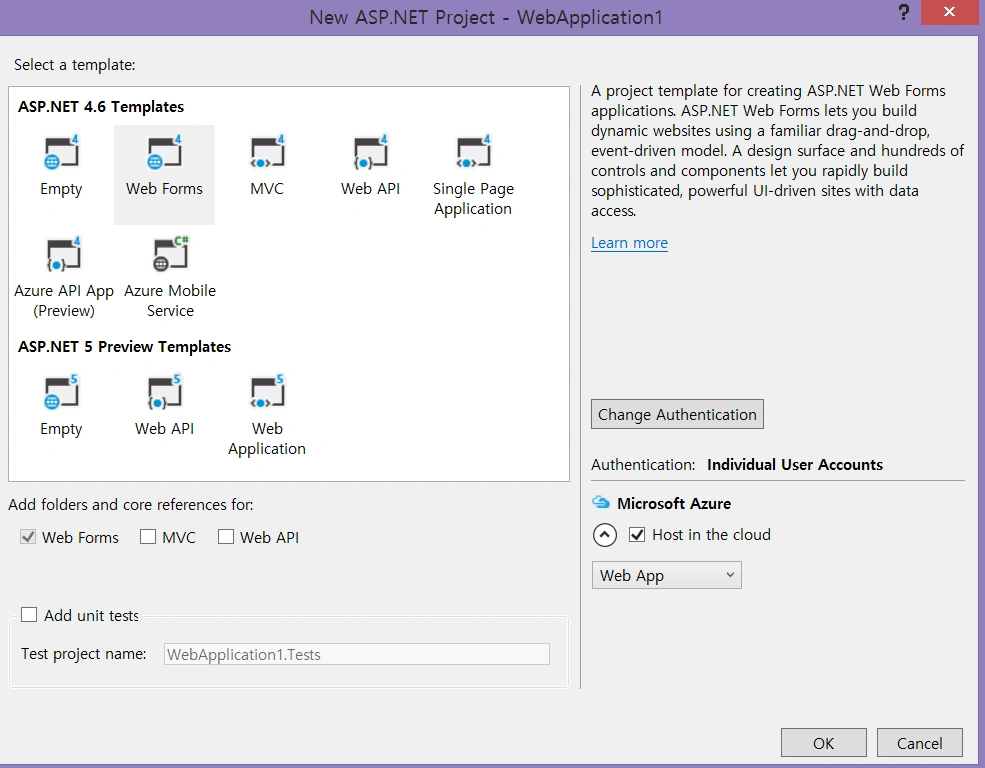
Select Web Forms and click OK.
Now our web application has been created. Add all script and image files needed for this project.
JavaScript Declaration Part
Firstly, add all the JavaScript references and styles to your ASP.NET page as in the following:
- <meta http-equiv="Page-Enter" content="blendTrans(Duration=0.0)" />
- <meta http-equiv="Page-Exit" content="blendTrans(Duration=0.0)" />
- <meta http-equiv="x-ua-compatible" content="IE=9" />
- <script src="//ajax.googleapis.com/ajax/libs/jquery/1.7.1/jquery.min.js" type="text/javascript">
- </script>
- <meta http-equiv="Content-Type" content="text/html; charset=utf-8" />
- <script type="text/javascript" src="Scripts/jquery-1.10.2.min.js">
- </script>
- <script type="text/javascript" src="Scripts/jscolor.js">
- </script>
Declare all the variables necessary for Greeting Card Tool. In each declaration I have added comments to explain its usage.
- <SCRIPT>
- //public Canvas object to use in all the functions.
- //Main canvas declaration
- var canvas;
- var ctx;
- var canvasEffect;
- var ctxEffect;
- var x = 75;
- var y = 50;
- //Width and Height of the canvas
- var WIDTH = 200;
- var HEIGHT = 252;
- // var dragok = false;
- //Global color variable which will be used to store the selected color name.
- var Colors = "";
- var newPaint = false;
- var DrawingTypes = "";
- //Circle default radius size
- var radius = 30;
- var radius_New = 30;
- var stickerWidth = 40, stickerHeight = 40;
- // Rectangle array
- rect = {},
- //drag= false defult to test for the draging
- drag = false;
- // Array to store all the old Shanpes drawing details
- var rectStartXArray = new Array();
- var rectStartYArray = new Array();
- var rectWArray = new Array();
- var rectHArray = new Array();
- var recttextXArray = new Array();
- var recttextYArray = new Array();
- var recttextWArray = new Array();
- var recttextHArray = new Array();
- var textXArray = new Array();
- var textYArray = new Array();
- var rectColor = new Array();
- var DrawType_ARR = new Array();
- var radius_ARR = new Array();
- var Text_ARR = new Array();
- var Text_ARRNew = new Array();
- // Declared for the Free hand pencil Drawing.
- var prevX = 0,
- currX = 0,
- prevY = 0,
- currY = 0;
- //to add the Image
- var ImageNames = new Array();
- var imageCount = 0;
- var imageObj = new Image();
- var imageObj_BG = new Image();
- //to clear the Canvas
- function clear() {
- ctx.clearRect(0, 0, WIDTH, HEIGHT);
- }
init is important since for each button click this function will be called and pass the parameter for each function type. In this method I will create an object for the canvas and this canvas object will be used in all other functions. Here for example the DrawType will be DrawImage, DrawText, DrawBorder, Place Uploaded Image as Background and the ImageName parameter will be used to pass each sticker image name and so on. In this init method I will create Mouse events such as Mousedown, Mousemove and MouseUp to add a sticker, move a sticker, resize a sticker and so on.
- //Initialize the Canvas and Mouse events for Canvas
- function init(DrawType, ImageName)
- {
- newPaint = true;
- canvas = document.getElementById("canvas");
- ctx = canvas.getContext("2d");
- canvasEffect = document.getElementById("canvas");
- ctxEffect = canvasEffect.getContext("2d");
- x = 5;
- y = 5;
- if (ImageName)
- {
- ImageNames[imageCount] = ImageName;
- imageCount = imageCount + 1;
- }
- DrawingTypes = DrawType;
- if (DrawType = 'BG')
- {
- ctx.drawImage(imageObj_BG, 1, 1, canvas.width - 1, canvas.height - 1);
- }
- radius = 30;
- radius_New = radius;
- canvas.addEventListener('mousedown', mouseDown, false);
- canvas.addEventListener('mouseup', mouseUp, false);
- canvas.addEventListener('mousemove', mouseMove, false);
- return setInterval(draw, 10);
- } // This is just a sample script. Paste your real code (javascript or HTML) here.
- if ('this_is' == /an_example/)
- {
- of_beautifier();
- }
- else
- {
- var a = b ? (c % d) : e[f];
- }


joy kcPosted Jan 16, 2021, 8:00 AM
Sir please provide this project in Asp.net mvc.
Mohammed IbrahimPosted Jan 13, 2016, 8:26 AM
Syed Shanu, Nice
Raja TPosted Jan 13, 2016, 6:39 AM
Nice, Thanks for sharing
Rupesh KahanePosted Dec 30, 2015, 7:11 AM
Excellent
Dhanik SahniPosted Dec 30, 2015, 12:41 AM
really nice
Saillesh PawarPosted Dec 29, 2015, 11:45 PM
Good 1 appreciate your hard work.. Will try it for sure
Manoj KallaPosted Dec 25, 2015, 5:29 AM
Very good and great article...
Ankit BansalPosted Dec 24, 2015, 7:40 AM
nice..
Upendra Pratap ShahiPosted Dec 24, 2015, 6:22 AM
Great stuff sir...thanks a lot for sharing....
Debasis SahaPosted Dec 24, 2015, 4:55 AM
Nice one.
Sibeesh VenuPosted Dec 24, 2015, 3:43 AM
Article Of The Day : Dec 24 2015, Congrats :)
Aditya PatelPosted Dec 24, 2015, 1:59 AM
good article
Kiranteja JallepalliPosted Dec 24, 2015, 1:29 AM
very nice article Syed Shanu
Santhakumar MunuswamyPosted Dec 23, 2015, 3:50 PM
Thanks for nice article. Keep it up
Raja TPosted Dec 20, 2015, 11:20 PM
Nice Sir, Thanks for sharing
Jaipal ReddyPosted Dec 20, 2015, 11:17 PM
Thanks for share.
Anu VPosted Dec 20, 2015, 11:14 PM
Nice article sir
Muhammad Aqib ShehzadPosted Dec 19, 2015, 3:17 AM
fantastic piece of tool
Gowtham KPosted Dec 18, 2015, 7:36 AM
Great Work, Thanks for sharing it
Humayun Kabir MamunPosted Dec 18, 2015, 4:51 AM
Nice...
Shridhar SharmaPosted Dec 18, 2015, 4:45 AM
nice post sir
Jeetendra GundPosted Dec 18, 2015, 4:00 AM
Good share
Nitesh KejriwalPosted Dec 17, 2015, 7:19 AM
Nice example @Syed..
Ankur MistryPosted Dec 17, 2015, 6:50 AM
Good one