

Welcome back to the Learn Angular 8 in 10 Days article series - Part 2. In the previous article, we discussed the basic concept of Angular including the benefits of Angular, Why it is a framework, etc. Now, in this article, we will discuss the Concept of Components. If you want to read the previous articles of this series, then follow the links.
So, in this article, we will discuss the Components in Angular 8. The component is the main building block of any Angular 8 applications. Components are composable, we can build larger components using multiple smaller components. Angular 8 is basically a component-based MVVM framework. So, before going to discuss how to create or use a component in Angular 8, first, we need to understand what is a component and why it is required in the current web-based application developments?
What is a Component?
A Component is basically a class that is defined for any visible element or controls on the screen. Every component class has some properties and by using them, we can manipulate the behavior or looks of the element on the screen. So, we can create, update, or destroy our own components as per the requirement at any stage of the application. But in TypeScript, a component is basically a TypeScript class decorated with an @Component() decorator. From an HTML point of view, a component is a user-defined custom HTML tag that can be rendered in the browser to display any type of UI element along with some business logic.
import { Component } from '@angular/core';

@Component({
  selector: 'app-root',
  templateUrl: './app.component.html',
  styleUrls: ['./app.component.css']
})
export class AppComponent {
  title = 'Welcome to Angular 8 Learning Series...';
}
Decorators are mainly JavaScript functions that amend the decorated class in some way. A component is an independent, complete block of code that has the required logic, view, and data as one unit. As a developer for creating a component, we just need to define a class by providing some related configuration objects as an argument or parameter to the decorator function. Logically every component in Angular 8 acts as an MVC concept itself. Since each component class is an independent unit, it is highly reusable and can be maintained without messing with other components.
Why need Component-Based Architecture?
As per the current trend in web application development, the component-based architecture will act as the most usable architecture in future web development. Because, with the help of this technique, we can reduce both development time and cost in a large volume in any large-scale web development project. That’s why technical experts currently recommend implementing this architecture in web-based application development. So, before going to discuss components in-depth, let's discuss why this component-based architecture is required for web-based development.
- Reusability: Component-based frameworks are much more useful due to their reusability features in development. In this framework, components are the most granular units in the development process, and development with components allows us a provision of reusability in future development cycles. Since today, technology is changing rapidly. So, if we develop an application in a component-based format, then we are able to swap the best components in and out. A component-based architecture approach allows your application to stay up-to-date over time instead of rebuilding it from scratch.
- Increase Development Speed: Component-based development always supports agile methodology-based development. Components can be stored in a library that the team can access, integrate, and modify throughout the development process. In a broad sense, every developer has specialized skills. As an example, someone can be an expert in JavaScript, another in CSS, etc. With this framework, every specialized developer can contribute to developing a proper component.
- Easy Integration: So, in the component-based framework we can develop a library repository related to the component. This component repository can be used as a centralized code repository for the current development as well as the future new development. As the other centralized code repository, we can maintain this library in any source control. In this way, the developer can access those repositories and can be updated with new features or functionality as per the new requirement and submit for approval through their own process.
- Optimize Requirement and Design: We can use component-library as a base UI component reference source and so using this source analysis team members like product managers, business analysts, or technical leaders need to spend less time finalizing the UI design for their new requirements. Because they already have a bunch of fully tested components with full functionality. Just they need to decide the process about the enhancement points including new business logic only. In this way, this component-based framework provides faster speed for the development process lifecycle.
- Lower Maintenance Costs: Since the component-based framework supports reusability, this framework reduces the requirement of the total number of developers when we want to create a new application. Logic-based components are normally context-free, and UI-based components always come with great UX and UI. So, the developer can now focus on integrating those components in the application and how to establish connections between these types of components. Also, other system attributes like security, performance, maintainability, reliability, and scalability, (which are normally known as non-functional requirements or NFRs) can also be tested.
@Component Metadata
So in Angular, when we want to create any new component, we need to use the @Component decorator. @Component decorator basically classifies a TypeScript class as a component object. Actually, @Component decorator is a function that takes different types of parameters. In the @Component decorator, we can set the values of different properties to finalize or manipulate the behavior of the components. The most commonly used properties of the @Component decorator are as follows.
- selector: A component can be used by the selector expression. Many people treat components like a custom HTML tag because finally when we want to use the component in the HTML file, we need to provide the selector just like an HTML tag.
- template: The template is the part of the component that is rendered in the browser. In this property, we can pass the HTML tags or code directly as inline code. Sometimes, we call this the inline template. To write multiple lines of HTML code, all code needs to be covered within the tilt (`) symbol.
- template URL: This is another way of rendering HTML tags in the browser. This property always accepts the HTML file name with its related file path. Sometimes it is known as the external template. The use of this property is much better when we want to design any complex UI within the component.
- module: This is used to resolve the related path of the template URL or style URL for the component objects. It contains the ID of the related modules in which the component is attached or tagged.
- styles / stylesUrls: Components can be used in their own style by providing custom CSS, or they can refer to external style sheet files, which can be used by multiple components at a time. To provide an inline style, we need to use styles, and to provide an external file path or URL, we need to use styleUrls.
- providers: In real-life applications, we need to use or inject different types of custom services within the component to implement the business logic for the component. To use any user-defined service within the component, we need to provide the service instance within the provider. Basically, the provider property is always allowed array-type value. So that we can define multiple service instance names that can be provided by comma separation within this property at a time.
In the below example, we demonstrate how to define a component using some of the above properties like selector and template.
import { Component } from '@angular/core';

@Component({
  selector: 'app-root',
  template: 'Welcome to Angular 8 Learning Series...'
})
export class AppComponent {
}
Now, in the below example, we will demonstrate how to use other @Component decorator properties like templateUrls.
import { Component } from '@angular/core';

@Component({
  moduleId: module.id,
  selector: 'app-root',
  templateUrl: './app.component.html'
})
export class AppComponent {
  title = 'Welcome to Angular 8 Learning Series...';
}
So, in the above example, we will separate the HTML file for storing the HTML part related to the components. As per the above example, we need to place both the TypeScript file and HTML file in the same location. If we want to place the HTML in a separate folder, then we can use that file in the component decorator using a relative file path. Below is the sample code is written in the app.component.html file.
<div style="text-align:center">
    <h1>
        Welcome to {{ title }}!
    </h1>
</div>
Life Cycle of a Component
Just like other frameworks, Angular components have their own life cycle events that are mainly maintained by Angular itself. Below is the list of life cycle events of any Angular components. In Angular, every component has a life-cycle, a number of different stages it goes through from initialization to destruction. There are eight different stages in the component lifecycle. Every stage is called a life cycle hook event. So, we can use these component lifecycle events in different stages of our application to obtains complete controls on the components.
- ngOnChanges: This event executes every time a value of an input control within the component has been changed. This event activates first when the value of a bound property has been changed.
- ngOnInit: This event is executed at the time of Component initialization. This event is called only once, just after the ngOnChanges() events. This event is mainly used to initialize data in a component.
- ngDoCheck: This event is executed every time when the input properties of a component are checked. We can use this life cycle method to implement the checking on the input values as per our own logic check.
- ngAfterContentInit: This lifecycle method is executed when Angular performs any content projection within the component views. This method executes only once when all the bindings of the component need to be checked for the first time. This event executes just after the ngDoCheck() method.
- ngAfterContentChecked: This life cycle hook method executes every time the content of the component has been checked by the change detection mechanism of Angular. This method is called after the ngAfterContentInit() method. This method can also be executed on every execution of the ngDoCheck() event.
- ngAfterViewInit: This life cycle method executes when the component completes the rendering of its view fully. This life cycle method is used to initialize the component’s view and child views. It is called only once, after ngAfterContentChecked(). This lifecycle hook method only applies to components.
- ngAfterViewChecked: This method is always executed after the ngAterViewInit() method. Basically, this life cycle method is executed when the change detection algorithm of the angular component occurs. This method automatically executes every execution time of the ngAfterContentChecked().
- ngOnDestroy: This method will be executed when we want to destroy the Angular components. This method is very useful for unsubscribing the observables and detaching the event handlers to avoid memory leaks. It is called just before the instance of the component being destroyed. This method is called only once, just before the component is removed from the DOM.
Nested Component
In the above section, we discussed the different aspects of components, like the definition, metadata, and life-cycle events. So, when we develop an application, it is very often that there are some requirements or scenarios where we need to implement a nested component. A nested component is one component inside another component, or we can say it is a parent-child component. The first question that might be raised in our mind is: “Does Angular framework support these types of components?” The answer is yes. We can put any number of components within another component. Also, Angular supports the nth level of nesting in general.
Demo 1. Basic Component
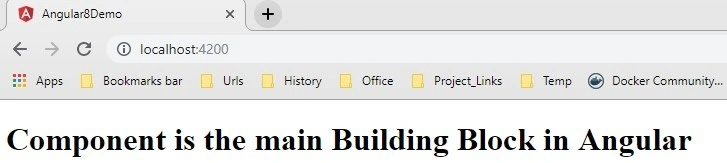
Now, we need to create a new component in our Angular 8 Projects. So, either we can create a new project or use the same project as the previous article. In the project folder, we have a component file named app.component.ts. Now, we will first develop a component with inline HTML contains. For that purpose, we will make the below changes in the existing app.component.ts file.
app.component.ts
import { Component } from '@angular/core';

@Component({
  selector: 'app-root',
  template: '<h1>Component is the main Building Block in Angular</h1>'
})
export class AppComponent {

}
Now after making the following changes, run the application in the browse.
Demo 2. Apply Style into the Content
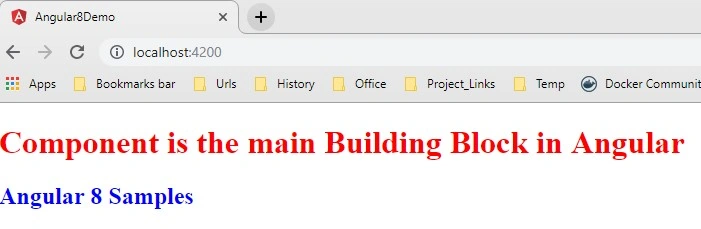
Now, we need to apply the styles in the above component. So, for that, we will make the below changes in the component. First, we will apply the inline styles in the component.
import { Component } from '@angular/core';

@Component({
  selector: 'app-root',
  template: '<h1>Component is the main Building Block in Angular</h1> <h2>Angular 8 Samples</h2>',
  styles: ['h1 { color: red; font-weight: bold; }', 'h2 { color: blue; }']
})
export class AppComponent {

}
Now after making the following changes, run the application in the browse.
Demo 3. Use External Stylesheet File for Component
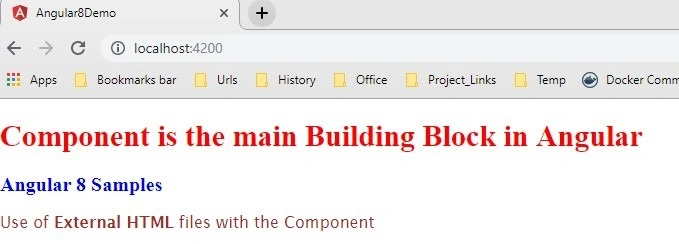
In the previous demo, we used the inline style sheet to decorate the HTML content within the component. Now it is fine when we just need to use styles in one component. But, if we want to apply the same styles in all the components, then we need to use the external stylesheet within the component. Now, we will discuss how to use an external style sheet in any component. First, we need to create a new style sheet file named custom.css within the project and then add the below code within the same file.
/* You can add global styles to this file, and also import other style files */

h1 {
    color: red;
    font-weight: bold;
    font-size: 30px;
}

h2 {
    color: blue;
    font-size: 20px;
}

p {
    color: brown;
    font-family: 'Lucida Sans', 'Lucida Sans Regular', 'Lucida Grande', 'Lucida Sans Unicode', Geneva, Verdana, sans-serif;
}
Now, just put the style.css reference path in the styleUrls properties within the app.component.ts file.
import { Component } from '@angular/core';

@Component({
  selector: 'app-root',
  template: '<h1>Component is the main Building Block in Angular</h1> <h2>Angular 8 Samples</h2>',
  styleUrls : ['./custom.css']
})
export class AppComponent {

}
Now reload the browser for the output (which is just same as the previous demo)
Demo 4. Use External HTML File for Component Content
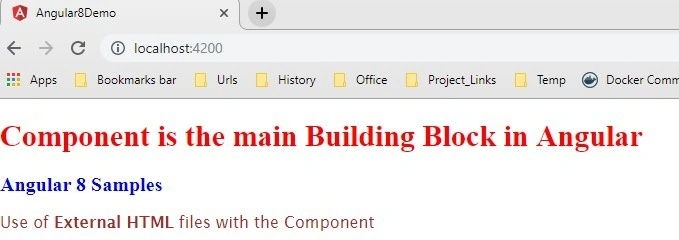
Similar to the external style, we can also use the external HTML file for the HTML code part. For that, we first need to add a new HTML file called app.component.html in the app folder and write down the below code.
<h1>Component is the main Building Block in Angular</h1>
<h2>Angular 8 Samples</h2>
<p>
    Use of <b>External HTML</b> files with the Component
</p>
Now make the below changes in the app.component.ts file for pass the external HTML file path reference.
import { Component } from '@angular/core';

@Component({
  selector: 'app-root',
  templateUrl: './app.component.html',
  styleUrls: ['./custom.css']
})
export class AppComponent {

}
Now, refresh the browser for the output.
Demo 5. Component Life Cycle Demo
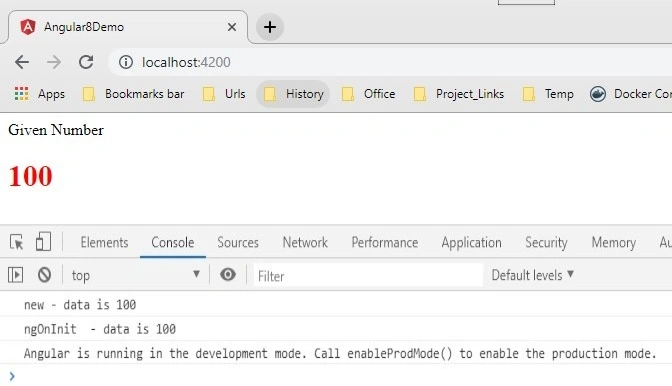
Now in this demo, we will demonstrate the life cycle events of a component. For that, add the below code in the app.component.ts file –
import { Component } from '@angular/core';

@Component({
  selector: 'app-root',
  templateUrl: './app.component.html',
  styleUrls : ['./custom.css']
})
export class AppComponent {
  data: number = 100;

  constructor() {
    console.log(`new - data is ${this.data}`);
  }

  ngOnChanges() {
    console.log(`ngOnChanges - data is ${this.data}`);
  }

  ngOnInit() {
    console.log(`ngOnInit  - data is ${this.data}`);
  }
}
Now add the below code in app.component.html file.
<span class="setup">Given Number</span>
<h1 class="punchline">{{ data }}</h1>
Now refresh the browser to check the output.
Demo 6. Nested or Parent-Child Component
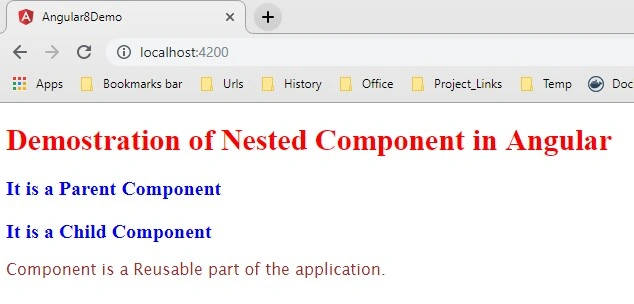
In Angular, we can develop any component as a parent-child concept. For that purpose, we need to use the child component selector within the parent component HTML file. So, first, we need to develop a child component as below.
child.component.ts
import { Component } from '@angular/core';

@Component({
  selector: 'child',
  templateUrl: './child.component.html',
  styleUrls : ['./custom.css']
})
export class ChildComponent {

}
child.component.html
<h2>It is a Child Component</h2>
<p>
    A component is a Reusable part of the application.
</p>
app.component.ts
import { Component } from '@angular/core';

@Component({
  selector: 'app-root',
  templateUrl: './app.component.html',
  styleUrls: ['./custom.css']
})
export class AppComponent {

}
app.component.html
<h1>Demostration of Nested Component in Angular</h1>
<h3>It is a Parent Component</h3>
<child></child>
Now include the child component into the app.module.ts file as below.
import { BrowserModule } from '@angular/platform-browser';
import { NgModule } from '@angular/core';

import { AppComponent } from './app.component';
import { ChildComponent } from './child.component';

@NgModule({
  declarations: [
    AppComponent,
    ChildComponent
  ],
  imports: [
    BrowserModule
  ],
  providers: [],
  bootstrap: [AppComponent]
})
export class AppModule { }
Now, refresh the browser to check the output.
Conclusion
In this article, we discussed different aspects of the component. Also, we discussed the different metadata properties of the components and benefits of the component structure, including the life cycle events of a component. Now, in the next article, we will discuss another important feature of Angular i.e. Data Binding. I hope, this article will help you. Any feedback or query related to this article is most welcome.
Next Article, Learn Angular 8 Step By Step in 10 Days – Data Binding (Day 3)
PutulPosted Sep 28, 2020, 5:48 AM
This article is very very much helpful and simpler also. But while writing styleUrls : ['./custom.css'] in child component it gives error When i wrote ['./child.css'] Error has gone and working fine giving the expected result.
Robin HaiderPosted Nov 20, 2019, 1:58 PM
Thank you very much.....
Mahesh AllePosted Oct 21, 2019, 5:10 AM
Good Article. Thank you for posting this one. The moduleId present in the component class is still not clear. If you can post some example or elaborate little bit more, then that wood be really helpful. Also for the Component Life Cycle Demo, if you can cover all the life cycle hooks, then it will be help full. Overall is good.
Rohit GuptaPosted Oct 2, 2019, 6:09 AM
Just want to share that, one error that I faced is that the new child component that we are creating needs to be added to the NgModules before executing the code
Yashlok KumarPosted Sep 26, 2019, 7:33 AM
Day_02.rar file unable to unzip, it is giving error
Huy NguyễnPosted Sep 25, 2019, 10:01 AM
All things i need ,i'm trying learn Angular8.Thanks sir.Amazing and i think ,we can make magically with them.
rupal sharmaPosted Sep 23, 2019, 3:39 AM
Sir day 6??
Hamid KhanPosted Sep 15, 2019, 7:27 AM
Very good article for our learing………..
ravi tejaPosted Sep 4, 2019, 9:23 AM
Note for Demo 6: Update app.module.ts to make use of ChildComponent.
Sarathlal SaseendranPosted Aug 19, 2019, 6:33 AM
Very good article as usual.
Amit Kumar SinghPosted Aug 19, 2019, 5:35 AM
Thanks for sharing informative article
Pankajkumar PatelPosted Aug 19, 2019, 12:17 AM
Very informative and helpful
Amit MohantyPosted Aug 18, 2019, 11:15 PM
Nice article.
Bidyasagar MishraPosted Aug 18, 2019, 8:51 PM
Good article sir