Crystal Report In Visual Studio
We use Crystal Report in Visual Studio to create the reports. Here, we have some steps to make a successful Crystal Report in Visual Studio.
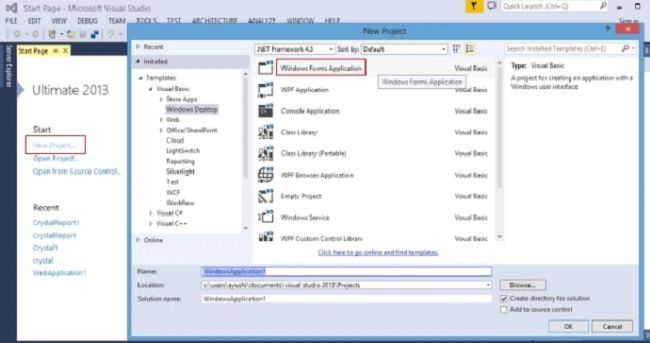
Step 1
Open Visual Studio and click New Project -> Window Form Application. Give the name of the project and click OK.
Step 1
Open Visual Studio and click New Project -> Window Form Application. Give the name of the project and click OK.
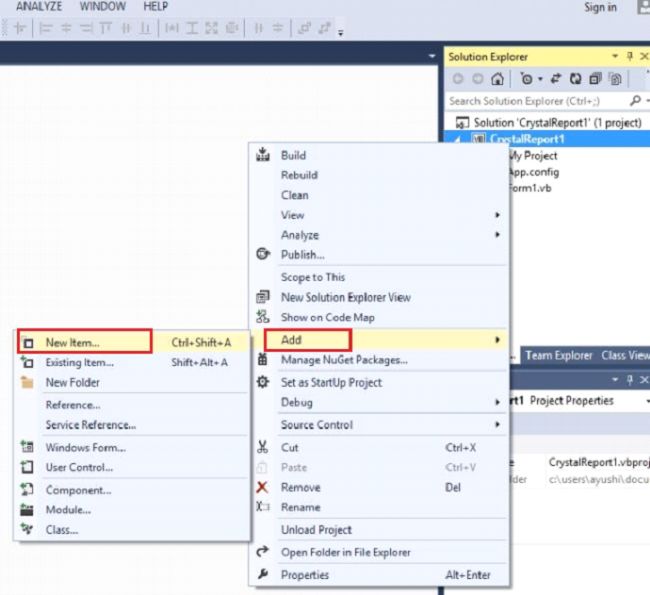
Step 2
Subsequently, choose the project, go to the Solution Explorer -> Right click on project name -> Add -> New Item.
Step 3
Click Reporting-> Crystal Reports and click 'Add' button.

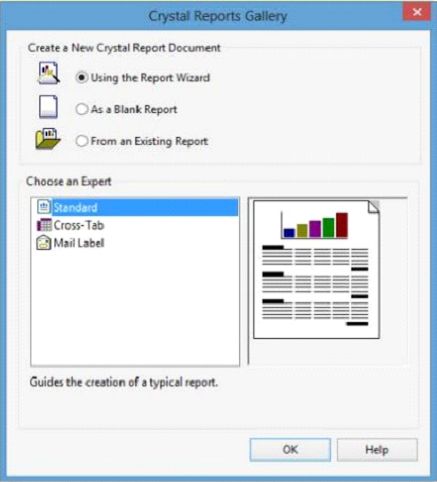
Step 4
Here, we see a box of Crystal Reports gallery. Choose the default settings and click OK.
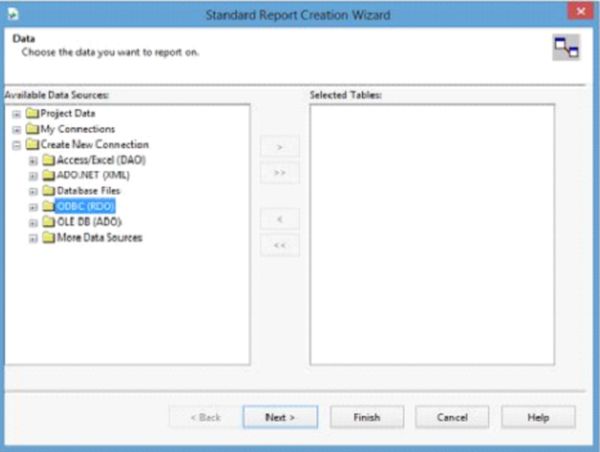
Step 5
Now, select ODBC Data Source and click OK.
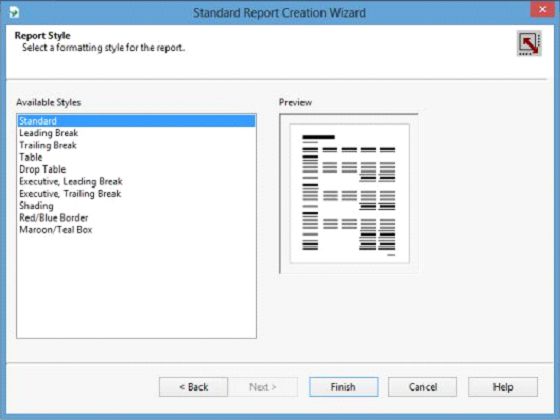
Step 6
Here, choose standard style and click OK.
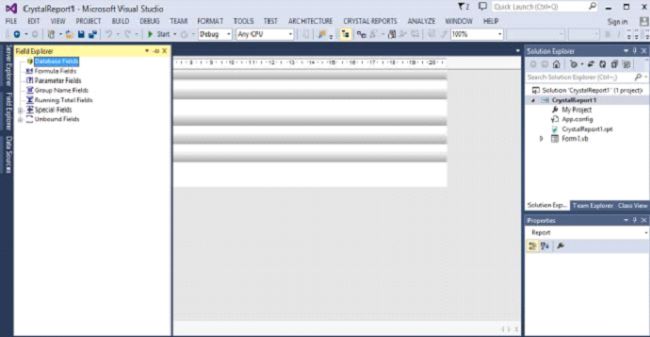
Step 7
After completing all the process, we see the Crystal Reports design Window.
Summary
Thus, we learned, how to create Crystal Report in Visual Studio.
Subsequently, choose the project, go to the Solution Explorer -> Right click on project name -> Add -> New Item.
Step 3
Click Reporting-> Crystal Reports and click 'Add' button.
Step 4
Here, we see a box of Crystal Reports gallery. Choose the default settings and click OK.
Step 5
Now, select ODBC Data Source and click OK.
Step 6
Here, choose standard style and click OK.
Step 7
After completing all the process, we see the Crystal Reports design Window.
Summary
Thus, we learned, how to create Crystal Report in Visual Studio.